Situation #8 Russian Organized Defense: German Relief on the Korsun Pocket
This is solitaire game 1 for Situation #8. I’ve played it once before with an experienced wargamer who hadn’t played PanzerBlitz in decades, and his Russians smoked my Germans pretty bad.
Setting up for this game, now that I have the time, it’s making me wonder how he was able to get all those heavy mortar shots off, given the 4 hex spotting for Russian command post, for the 120 mm mortars only. I seem to recall him spotting out much longer ranges, and spotting for the heavy howitzer as well. This would make a huge difference in game play, and would certainly go a long way towards explaining why the Germans never even got halfway across board one in 8 turns, much less off Board 3 in 10 turns.
Of course, it didn’t help that my opponent got very lucky on a die roll and took out a stack of AFVs which I negligently left exposed. That and a CAT taking out a stack of PzKpfw IVs in a later turn (but that was a calculated risk, which I lost.)
Hopefully, in this solo game, I’ll be able to figure out what went wrong in that game. Or not.
Setting up
The Russians set up first on Board 1. The strategy is to make it hard for the Germans to even get on the board using mines and blocks, then once they’re on the board, hammer them with the artillery concealed on hill tops, while moving the guards and rifle units along the road to assume blocking positions if and when the Germans break through.
The Germans have to pick what they think will be the softest point of the Russian defensive line, and hammer on it very hard.
Scenario specific rules for indirect fire
The situation description states that Russian “CP’s may only spot for 120mm mortar (within 4 hexes.)” For this game, the assumption will be that the CP needs to be within 4 hexes of the mortar it calls fire for, but otherwise may call for fire on anything spotted in the CP’s line of sight. CPs may call for fire more than once each turn. For example, if there are three mortars and two CPs, one of the CPs may call for fire for two mortars.
This is a hole in the rules, and should probably be addressed by either 1. limiting call for fire onto a single target per (6 minute) turn, or 2. adding a clause to indirect fire rules increasing the amount of drift on each target when a CP is calling fire on more than one target.
German indirect fire will follow optional indirect fire rules as defined in \S 10.1.
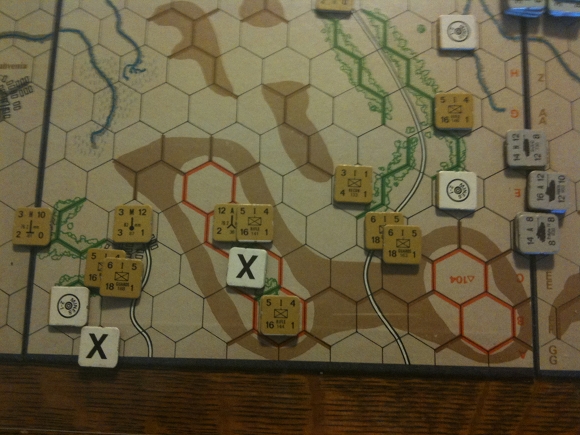
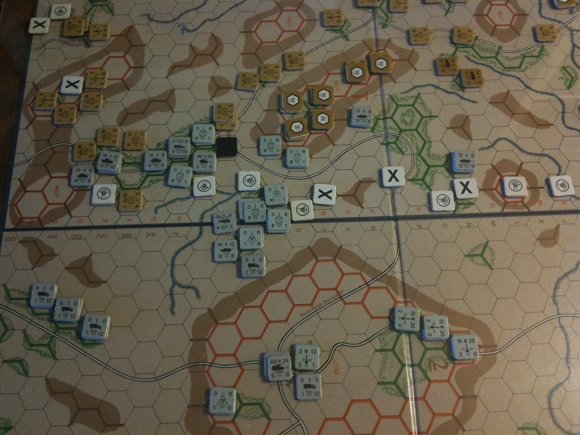
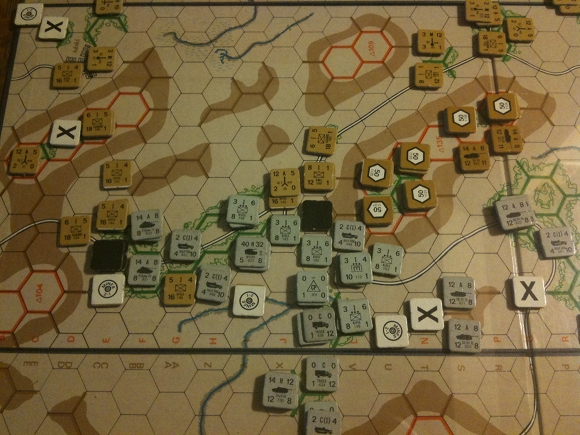
Initial position
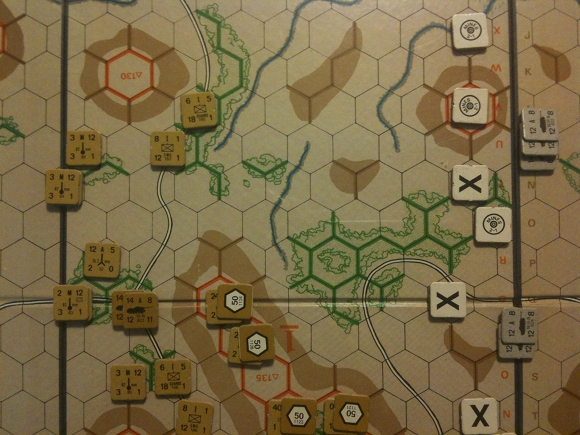
Here’s the eagle eye view:
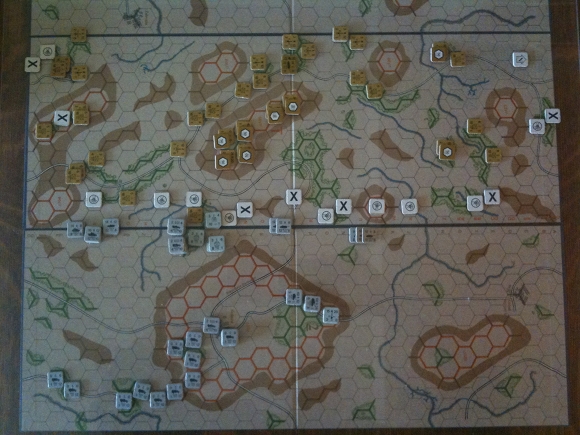
The image is muddy due to low light and iPhone camera, but the basic elements are clear.
-
The Germans place 1 CP forward, to direct fire on the Russian rifle, with infantry to follow with CAT if necessary. The engineers will move forward to take out the mines in the ford.
-
German transport is staged in a rear area until enough cover is cleared to allow mounting and transport. This is primarily trucks, the halftracks forming a vanguard to rapidly get the infantry into spotting positions.
-
Russian infantry are deployed along the road to Uschas. While infantry is ordinarily slow with 1 MF unmounted, road bonus grants 2 MF. This may not seem like much, but when you’re a German, and you’re stuck in a gully and dispersed between Hills 135 and 123, 2 MF/turn is distressingly fast. These units are far enough west to stay in play no matter where the Germans attempt to force through.
Detailed photos and explanations follow.
Note: There is a small but possibly significant error in this setup. The scenario calls for six (6) block counters, but I mistakenly deployed seven (7). This probably doesn’t matter all that much, but it could mean the difference of getting three or four more German units across Board 1.
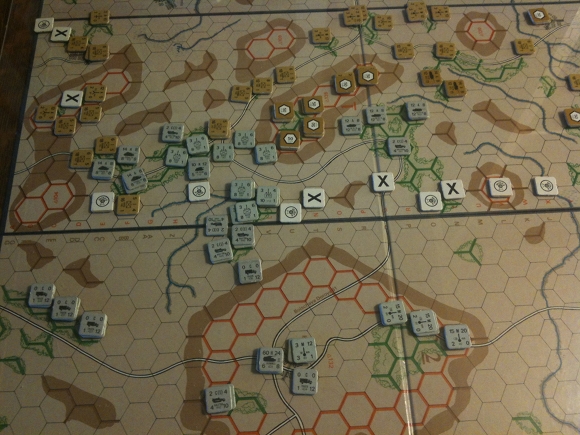
The north end of the map is fairly well sealed off, as most of the clear terrain can be covered with the heavy mortars, the pesky swamp funnels enemy vehicles into the maw of the howitzer lurking in Uschas.
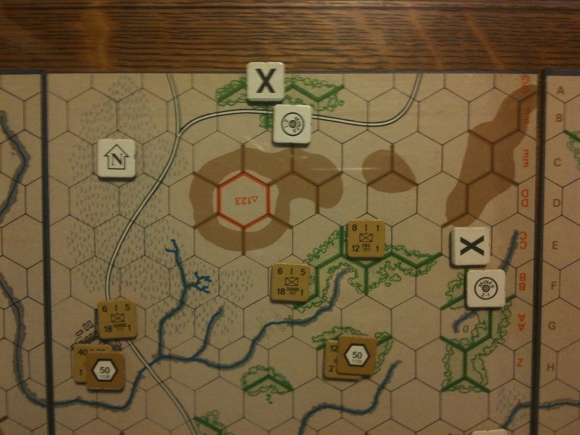
Close up of the units deployed around Uschas. This terrain is very difficult for vehicles, so the Russians feel comfortable with a nominal force to delay while reserve units move up along the western road towards Uschas.
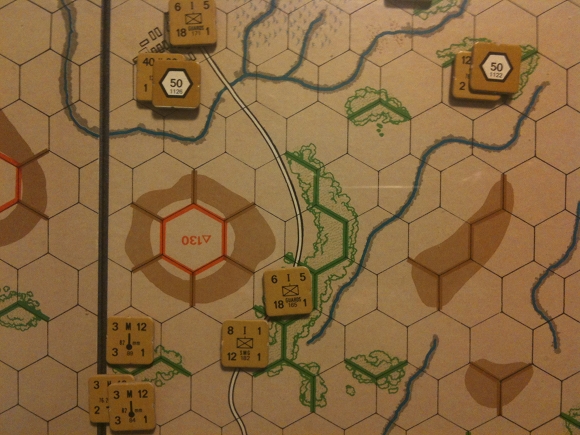
The Russians are relying on terrain to discourage German crossing north of Hill 135. The gullies cost trucks 5 MF to exit, which adds a turn to cross the board compared to crossing the hills to the south.
The Russians have made another blunder here by not putting at least one Rifle or Guards company in the middle forest. An infantry unit here would be exceedingly difficult for the Germans to kill, as lines of sight are very poor, and most good observation points are well covered by the mortars on Hill 135. However, the infantry units deployed along the Uschas road will move to seal off rear areas.
The Germans are going to attempt to outflank the Russians using armor to swing around the north of Hill 135. Getting AFVs in the Russian rear would be positively pestilential to Russian plans.
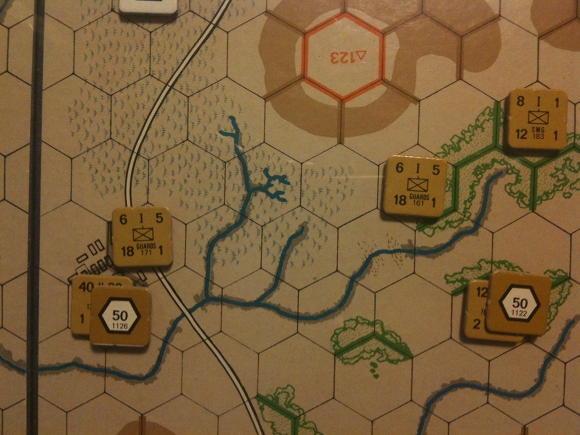
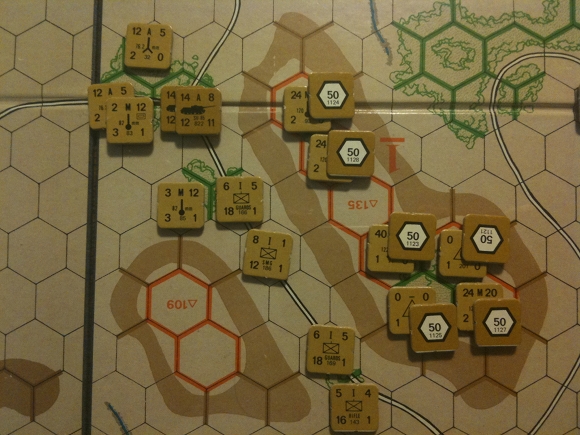
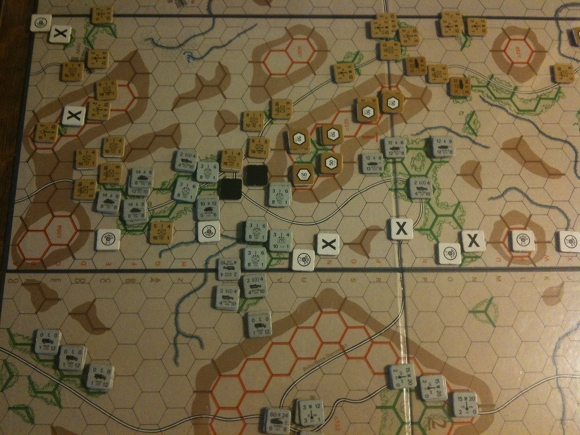
Guards and Submachine gun companies in reserve on western road, positioned to support Uschas if necessary. The mortars will harass transports attempting to exit across the clear terrain on board 3.
The Russian infantry reserve is lined up under cover along the western road loading north to Uschas. The mortars and command posts establish fields of fire covering most of boards 1 and 3. These need to be protected.
The Russian mortar companies have an MF of 1. These companies deployed on the west have an option to quickly (3 turns) take the road to Opustchenia, where they can harass German transports striking out onto board 3. While they are almost certain to be lost, just having them in Opustchenia should cost the Germans 1 or 2 units, and possibly a full turn of movement to exit.
The SU-85 are in reserve to (hopefully) counteract blatant attempts by the Germans to drive armor directly to the Russian rear.
In all, west of Hill 135 is the middle of the fighting area. Units deployed here are protected from emplaced German mortars on the Bednost mesa, and can move north or south as the situation dictates.
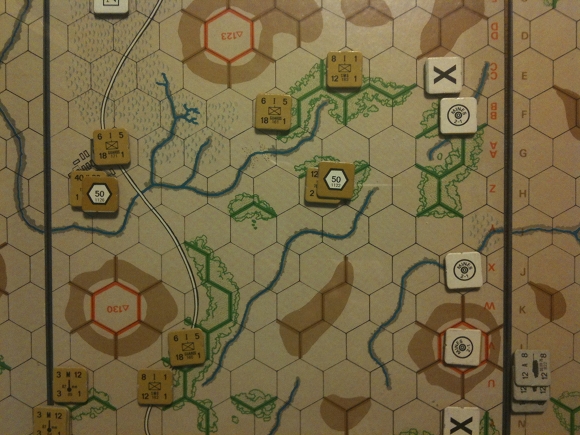
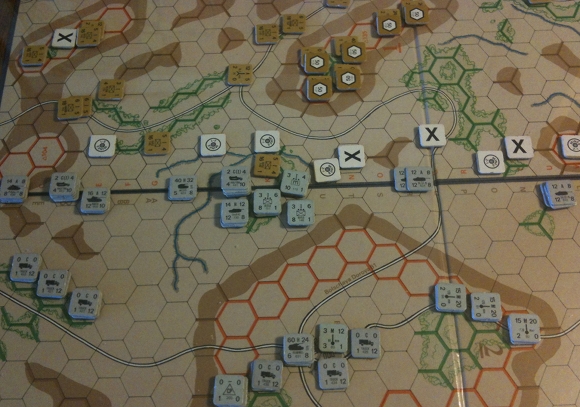
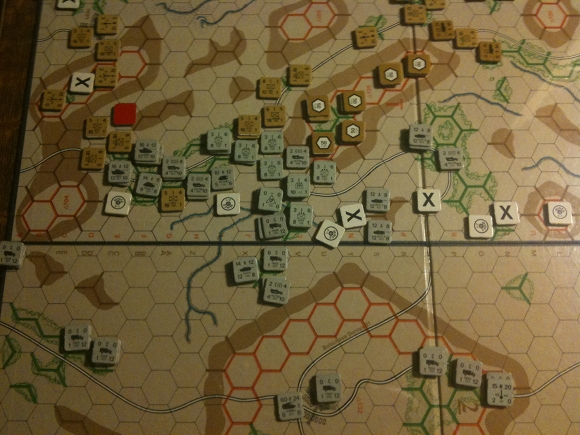
German infantry and engineers mass at the eastern ford to eliminate potential spotting units and remove the mine from the ford.
Armor and infantry will exploit a hole in the Russian line at 1E3 to move some infantry in on the ATG at the crossroads.
The ramifications of this is that the ATG at the crossroad is at high risk. The Russian recon unit, which is basically doing nothing at 1E4, should have been stacked with the ATG at 1J5. On the other hand, the Russians can move a rifle company to stack with it.
The Russians provide a slightly more than nominal force at Adski, in part to slow the Germans down if necessary, and the mortar to harass any transports caught out in the open on board 3 as the Germans attempt to escape.
Note: the German setup changed after this photo was taken. All the other photos have the German positions as was actually played.
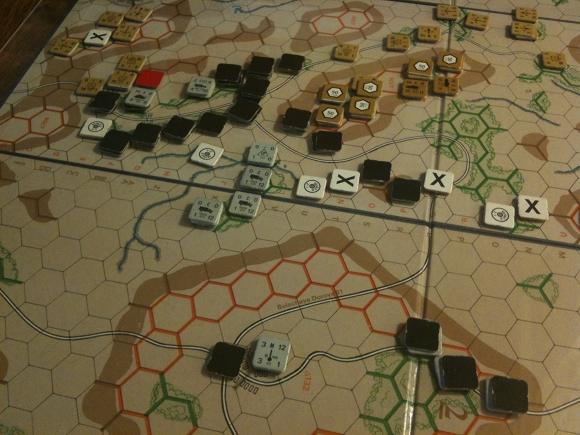
Below, you can see the Germans getting ready to exploit a hole in the Russian line at hex 1E3, which will put the Germans on the road, in cover and unspotted, hence protected against the mortars on Hill 135.
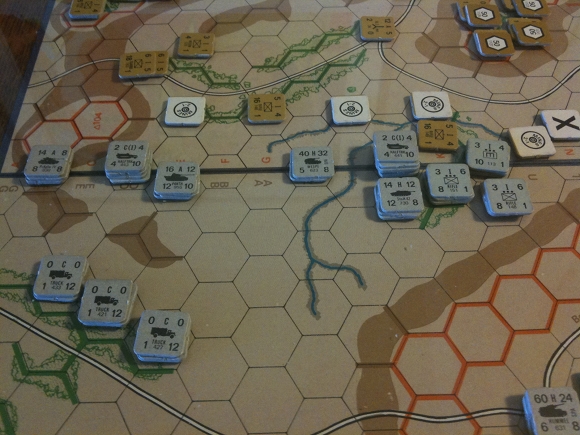
Closer look at the German initial position after setting up. The game is now ready to play.
Creating all these photos is time consuming, but it’s really handy to have a record for future reference. At some point, I’ll start using VASSAL. Currently, it puts too much of a load on my system to be comfortable to use.
Situation #8 is set up, let’s play PanzerBlitz.
Turn 1
Germans move first, and will swing around to the south to 1. open a lane for the trucks to get through, and 2. cut off infantry reinforcements moving north.
Here’s the end of the German phase:
And already I’m breaking or at least bending the rules by having stacked armor on the road in the forest. Stacking on roads is fine as long as the surrounding terrain costs are paid for movement. In this case, the surrounding terrain is “impassable” due to solid green hex sides.
I think I’m going to disallow this in the future, along with writing up a rules summary with examples.
Here’s the end of the Russian phase:
And that’s it for Turn 1.
Turn 2
And once again, the Germans are in a bind because they can’t call for fire to handle the Russian infantry. Neither of the CPs are in LOS of anything useful, and it’s going to take several turns to get them moved and emplaced somewhere safe.
Fire results were disappointing, the fortification yeilded a No Effect. The die rolled 5, which would have been a 6 accounting for forested terrain, which would have been nothing even at 3:1 instead of 2:1 odds.
Basically, in addition to the infantry, these 8 fortifications, emplaced on forested hilltops, are pretty much invulnerable.
The Russians have to kill German units to win, though, and the Germans can make that pretty hard. So far, the best the Russians are doing is dispersing, which isn’t going to be enough.
The Germans could probably play hide-and-seek with the infantry and CPs, and get the armor off the board for a win. Would be tough to get any of the infantry off now, since it’s all dismounted.
On to Turn 3.
Turn 3
Germans a few potshots, nothing exciting happened other than the mine finally cleared, which allowed the Germans to bring up a CP. This is going to be really useful. Necessary in fact.
Didn’t record fire for this turn. Having failed a 4:1 on a Russian rifle company in the forest was really disappointing. That unit it clogging up the works. The Germans have to go back and forth between keeping an advance, versus clearing out the rear area to allow transport to move forward.
The Russians now have a lot of targets. In fact, to Germans great chagrin, all 3 mortars can fire on a stack of German infantry at 3:1 odds, which is 2/6 chance of outright kill, and another 2/6 chance of getting a dispersal. With a kill, the rifle company can advance to close assault the Wespe.
Once again, I am have severe difficulties employing the German SPA effectively.
First up the long range mortars to support the units guarding the intersection. I made a huge blunder here as the Russian by combining my fire for a single roll at 3:1 when I could have had 3 rolls at 3:1 with 1/3 chance of eliminating on each roll. Of course, the combined attack gave 1/3 chance of eliminating the whole stack, which would have allowed the Russian infantry to advance up the lane. Had it succeeded, as noted above, this could have been a game-breaker for the Germans. By failing, it’s probably not a game breaker for the Russians, but it won’t make it any easier to halt the Germans.
| turn | firing | from | to | target | type | range | AF | DF | odds | drm | roll | result |
|---|---|---|---|---|---|---|---|---|---|---|---|---|
| R3 | R92 | 1M4 | 1I3 | G157 | ID | 4 | 24 | 8 | ||||
| R93 | 1Q7 | 1I3 | G158 | ID | 8 | 24 | 8 | |||||
| R91 | 1P7 | 1I3 | G159 | ID | 7 | 24 | 8 | |||||
| 72 | 24 | 3:1 | +1 | 6 | NE | |||||||
| R31 | 1B6 | 1F4 | G932 | D | 4 | 12 | 8 | 1:2 | +1 | 5 | NE | |
| R35 | 1J5 | 1J4 | G143 | D | 1 | 12/2 | 8 | 1:2 | +1 | 2 | NE | |
| R146 | 1G2 | 1F3 | G931 | CAT | 1 | 5 | 8 | 1:2 | +1 | 4 | NE |
Much more fire and close assaulting occurred. The new record sheet I created will be handy. In the meantime, using a legal pad to keep track of firing works really well.
The Russians didn’t do that well on their combat, but the dispersals they got can only help slow down the German advance.
Turn 4
Enough of the detailed game play for now! Compared to my first efforts back in Situation #1, I’m doing much, much better at describing game play. I’ll have to replay some of those early games with the attention to detail I’m demonstrating here. But for now, I want this off the table in favor of a third game of StarForce exploring Scenario 3.
Also, to be perfectly truthful, I’m a bit bored with the game at this point. All the photos and notes are a lot of work, without a clear payoff. Simply finishing this game has a great payoff: I can start another game!
Turn 4 opens with a couple of not unlucky 4:1 +1 drm shots from the artillery to take out Russian infantry. It would have really hurt if I’d rolled a 6 on either shot. Now it’s time to move, and I’m not sure exactly what I want to do yet. I’ve just figured out the the Russian tanks could go romping around in the German rear area, so I better ensure they don’t get there. On the other hand, I want to ensure I get some protection forward to gain ground. At the moment, it’s about to turn into a slug fest south of Hill 135.
Unfortunately, the not unlucky artillery shots have been followed up with some definitely unlucky CATs: total whiff on all of them.
Time for the Russians…and let’s try writing out by phases. Haven’t done this for PanzerBlitz yet.
Fire determination and resolution: 5 attempts: the 2 76.2 ATGs each take a shot at PzKpfw IVs at 1:2, scoring a D on one for their efforts. The 3 120mm mortars take another shot at the stack of German rifles at 4:1, and get an X; that’s 3 units for the Russians. The two SU-85s take 1:2 shots on the PzKpfws lurking on the ridge east of Hill 135, score a D for their efforts. In all, not bad results.
The actual phasing is defined by calling the shots, then resolving each one. I wrote them up together, above, to make it easier to read.
Vehicle movement none, the SU-85s both fired.
Leg and CAT: 4 attempts, managed one dispersal of a stack of Panthers at the south end of the Lane of Tears at 1:3 (11:32) odds. Not too bad, could have been better.
Dead pile: Germans 3, Russians 5, 1 mine removed.
Almost half done with this game.
Turn 5
The Germans still have a rough way to go, but with a couple of lucky rolls behind them, a few more lucky rolls might just see enough units off the Plains of Despair to acquire at least a draw.
Fire determination and resolution: The Hummel and StuH-42 (14-H-10) take out a Guard unit with 5/6 chance; I’ve been really unlucky with these types of shots. Panther takes on a rifle company, roll 1, dispersed! No effect for SG-III 75 shooting at SU-85 on the hills. German mortar on Hill 132 disperse a guards unit, critically important as this unit is about to get overrun as well, and every little bit helps.
Vehicle movement & overrun: First up, the PzKpfw overruns the just now dispersed guards unit, elimination on roll 1. Overkill, but why take chances with Russian infantry? The second CP moves up with the Wespe, risking a CAT, but in the woods, this would only be a dispersal at worst, and then only if the SMG unit which is adjacent isn’t eliminated or dispersed.
Leg and CAT: The engineers are finally in play, moving a 1:1 on the SMG in the woods to a 2:1, with a roll of 2 that’s an elim, and the CP and Wespe are safe for at least Turn 6. The Germans have been hitting some good rolls. Helps to be lucky.
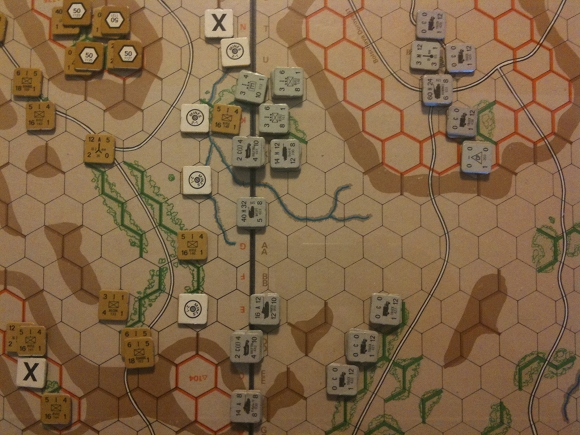
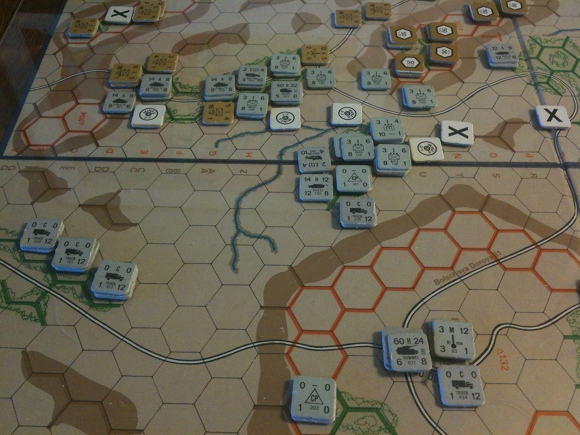
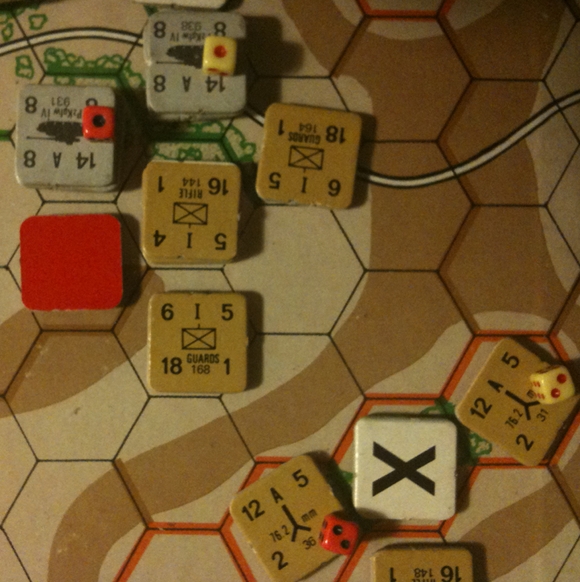
I wasn’t going to post any more photos of the game, but this situation at the end of the German phase was too good to pass up:
The Russians can still do a lot of damage to the Germans, and the Germans have a long way to go to get across the Plains of Despair, and an increasingly shorter time in which to cross.
However, the Russians might be in a bit of trouble here. They’re losing their infantry to heavy artillery, CATs and overruns. This is not good. And it’s not good that the Russians just don’t have that much effective fire this turn. For example, neither howitzer has any high value targets.
For example, R71 (pink die showing 2 pips) really wants to combine fire onto the stack of SG-III 75s (G823, pink die showing single pip) on the nearby hillside to the south, but technically has no line of site. It’s blocked by the forest green bar hex side.
Further south, the ATG R36 (red die, 2 pips) wants to fire on G931 (red die, 1 pip), but there is an intervening brown bar hillside closer to G931 than R36; no LOS. One the other hand, R31 can fire on G931, but probably not on G938. The optional rule allowing hex centers to determine LOS could allow firing, while the standard rule would find a green bar intervening from one the possible paths traced through hexes.
It’s not just “panzerbush,” it’s “panzerslope” as well.
Fire determination & resolution: Russians have 2 direct fire shots. First is using heavy mortars on the SG-III on the slope at 3:1. The second is the ATG R31 on G931 at 1:1 (12:8). For the first, roll 2 for elimination, about time! Second, roll 5 which is a miss.
Vehicle movement & overrun: The SU-85s need to find a way to pick off the Germans as they cross the Plains of Despair. Might be a good time to decamp to Zabvenia, just to cost the Germans an extra turn.
Leg and CAT: The first CAT on the panzers failed, a second on some halftracks succeeded. Leg units need to move due south to attempt to block movement onto the Plains.
Dead pile: German 4, Russian 8, 1 mine removed.
Half done!
Turn 6
It would be hard for the Russians to get a decisive victory at this point, but it’s probably just as hard for the Germans to get a marginal victory, which is 30 units off Board 3.
Fire determination and resolution: Had to use barrage fire to take out one of the fortifications. Very chancy stuff, 1/6 chance I would have burned out the artillery for nothing. I’ve gotten lucky this game on the dice. This will be helpful having one of the heavy mortars gone. I’m now thinking I’d have spent the barrage more effectively by taking out the CP, if I had only had a CP in line of sight for spotting.
Vehicle movement & overrun: at this point, I can’t really hide any more, and I’m going to have to make a run for the border. It’s almost attritional, I’m going to lose as many units per turn as the Russians have guns. For sure, 3 units per turn, and there are 5 fire turns left for the Russians. However, I’m leaving the Hummel behind, and the SG-III 75s to pester the Russian fortified CP. It may have been a mistake to have moved the Wespe so far forward.
Infantry & CAT: Infantry is mounting up this turn. Too close to the end of the game to do anything else.
Now for the Russians…
Fire determination: Only two good targets available, strangely enough, the PzKpfw on the slope which can be dealt with by the 122mm howitzer (finally), and the AFVs threatening the CP on Hill 135.
Fire resolution: For the mortars, 4:1 in woods, roll 5 for elimination. For the howitzer, 2:1 (40/2):8, roll 3, dispersed.
Vehicle movement & overrun: SU-85s roll into Zabvenia.
Infantry movement & CAT: The infantry is moving in a pincer formation to squeeze from both the north and the south. If the Germans are a little bit lucky, they will squirt out like a watermelon seed, but it will be costly. 2 CATs available, one from the north on halftrack, the other from the south on AFVs. Both succeed in dispersals, which is Bad News for Jerry.
Dead pile: German 8, Russian 9, 1 mine removed.
Turn 7
It’s appearing that moving the Wespe forward is a blunder. It’s just not getting that many shots off.
German:
Fire determination: Hummel took at a rifle company, another rifle dispersed.
Vehicle movement & overrun: Mostly mounting up infantry and moving everything as far forward as possible to stay away from oncoming Russian infantry. Huge traffic jam in the pass south of Hill 135. Let’s call it the Pass of Doom.
Infantry movement & CAT: almost all mounting up.
Russian:
Fire determination & resolution: 3 shots: 1 miss, and two dispersals.
Vehicle movement & overrun: Nothing to move.
Infantry movement & CAT: Spectacular CAT disperses stack of panzers in by the Lane of Tears. One or two more infantry units will be able to CAT next Russian move, might be the end of that stack. But the panzers served their purpose by soaking up infantry attention.
Dead pile: German 10, Russian 11, 1 mine removed.
Game will play out fast now.
Turn 8
The Germans are going to make a run for it! Nothing else they can really do. It’s a sure loss if they stay and fight, no matter how many Russians they kill.
Fire determination & resolution: Germans dispersed guards unit on slope, handy. Hummel proves its worth. Wespe didn’t fire.
Vehicle movement & overrun: Now it’s a nasty slog through the Pass of Doom to a mad dash across the Plains of Despair.
Infantry movement & CAT: Might leave back a mortar unit for the odd AF or so, not sure yet.
Russian:
Fire determination & resolution: Lots and lots of targets! 7 shots: 5 eliminations, 2 dispersals. Some of the kills were transport, which hurts double.
Vehicle movement & overrun: none.
Infantry movement & CAT: Moving the mortars towards Opustschenia to rain some long range death on trucks. Guards and friends continue to pester a stack of panzers along the Lane of Tears. Can’t go wrong with a roll of 1 in PanzerBlitz.
Dead pile: German 17, Russian 10, 1 mine removed. This doesn’t count removing the Russian fortification, but it should.
Turn 9
German strategy for Turn 9 is just run, run, run. Not even going to bother firing. Except for the Hummel which fired on a guards unit and missed.
Vehicle movement & overrun:
Infantry movement & CAT:
Russians can just fire and fire and fire. They’re looking at a tactical victory almost surely, and with good rolling, a decisive is not out of the question.
The Russians fired 7-8 times and hit every time, mostly kills. Lots of 1s and 2s on the dice. Bummer for the Germans.
Dead pile: German 29, Russian 11, 1 mine removed. And I am counting the fortification because it soaked up a lot of time to remove.
Turn 10
Germans get 9 units off the map, with most of the rest exposed, including panzers with a 4:1 sure kill, so it’s done for me. The Russians got their 30 for the decisive.
Russian had at least 1 sure kill at 4:1, so I didn’t bother moving all the German units, just enough to ensure I had as much of the game to get decisive victory for the Russians.
Dead pile: German 30+, Russian 11, 1 mine removed.
Germans: 9 units exits.
Russians: 30+ German units eliminated.
Decisive Russian victory. Not even close.
AAR
The first thing to note is that this situation can take quite a while for the Russian player to set up. For a first time player, budget an hour for the Russian. It’s almost guaranteed analysis paralysis. The German play will also need some time to set up, probably about 30 minutes after the Russians are finished. These set up times decrease with experience, and with multiple plays of the scenario.
Another thing I’m sure of now, from this game, is that I’m at least very slightly biasing the game play for some of these solo games. It doesn’t feel overt. It seems to come out as unconscious leaning toward to making one side or another have small advantages, which add up. A general example might be making a sub par move, or not firing on an appropriate target. I won’t see these until after the turn finishes.
I think the effect comes from focusing on playing one side really, really well, while just not thinking about the other side. The Russian phase in Turn 3 illustrates this perfectly. My focus was on getting the Germans positioned to clear a lane, with a result of being horribly exposed.
If I haven’t written it elsewhere, I’m not inclined to argue much about rules, even when I know I’m citably correct. Basically, if someone wants to dispute a rule or LOS or a movement, I’ll geneconcede. I’ll do this both on the player’s and my turn, and allow the opponents to interpret as they see fit, to my disadvantage. When I’m playing myself in a solitaire game, I’m much more strict.
Blunders
What a brutal game. It took two or three weeks to get through. In part because I’m busy at work, but also because I made a determined effort to have a good showing for the Germans.
Russians did not use their position as well as they could have:
-
The 122mm howitzer should bracket, one in Uschas or similar northern emplacement, the other on the south side of the board in the woods on Adski Hill (126). With range 20, each can fire on enemy on their half of the fighting ground, while overlapping to some extent in the middle. Having the howitzer at 1N6 is relatively ineffective in the early game. (It may come in to play in the later game.)
- Leaving a hole at 1E3.
- Not reinforcing the crossroad at 1J5 with that spare Recon unit.
German blunders include not getting a CP way forward into cover and defensible terrain. On the south edge of Board 1, this means Hill 126 east of Adski. That would have been pretty tough, to be sure, but would have been a serious threat to the Russians.
Barrage fire took out a fortification with a mortar. It would have been better to spend those tubes on a Russian CP.
Mine and block placement
Handicapping
Tipping it in the German favor may only require removing one of the 122mm howitzers. These are so important for wearing away at the Germans that losing even one will have an effect.
One or more of the fortifications could be removed from the OOB, which would force the Russian player into even more of a defensive posture, and would change how fields of fire were established. Currently, the fortifications at DF 50 on top of hills are for the most part impregnable. A one shot elimination is not guaranteed when they’re in wooded hexes, and in the worst case, with unit firing from below the hilltop, attack factors would need to total between 100 and 200 to get a 5/6 chance of elimination. CAT atacks just can’t muster enough AF fighting uphill.
What would be better here would be a range of fortification strength from, say, 20 to 50, where the Russian player could choose which locations got the strongest fortifications.
On the German side, remove one or more of the light SPAs, either the StuH 42 or the GW 38(M). These guns don’t have a lot of power or range, but since they’re howitzers, they get full AF on soft targets. That’s a big deal and can tip odds a full column right.