Situation #7, Game 1, Meeting engagement during German relief of Kiev
The notorious Situation #7. Among Long time players, this situation is held to be a slam dunk for a competent German player.
Number of Russian counters: 50
Number of German counters: 32
Introduction
One of the dangers of doing background research for game play preparation is that it may unwittingly introduce bias into one’s perception. In this case, reading about Situation #7’s lopsidedness has predisposed a certain lack of interest on my part.
While it would be nice to annotate every turn, and that is something of a goal with respect to the series of games I’m playing, in this case, I may decide just to play out the scenario without worrying over much about taking notes. It’s more important to have fun playing than to worry about anything. Worry defeats the whole purpose!
Let’s see what happens.
Turn 1
Germans move first, splitting into three groups, north, central and south. This is a race to get optimum positioning on Board 2, then dig in and punish the Russians trying to dislodge the Germans from positions. A Panther from the central group reaches Bednost, with the rest of the central group in road march order towards Opustochenia. Most of the units in the northern and southern groups ended up in the clear, unavoidable, but not within range of Russian units.
Ok, this really is going to suck for the Russians. The Germans can at least some units on Board 2 the first turn, the Russians cannot. The farthest they can get is almost to the edge of Board 2, having to move through adverse terrain.
Turn 2
Germans move to fully occupy Bednost and Golod, with a very small presence at the south end of the map.
Russians coming in large force at south end and north end, considering leaving Bednost alone.
Turn 3
Germans have to make a decision here, because they win by default having as many units on the board as the Russians. So they need do no more than defend what they have. However, the more Russian units they can prevent from getting on Board 2, the better their victory.
First up, Germans disperse T-34s on north slope of Hill 132. Next, reposition to establish dominant fields of fire on most of Board 2. The Russians are now forced to be very aggressive, but cannot risk losing too many units.
If the Russians can push the Germans off Board 2, this also counts for victory conditions. However, the German’s last move positioned the Wespe to cover the open ground on the north end of Board 2. This is going cost at least the dispersed T-34.
On the other hand, a German Panther foolishly exposed itself to an overrun by a pair of T-34s, which landed behind a brown slope bar, hence concealed from fire this turn. First kill to Russians.
Turn 4
And the Germans get kill on T-34 which was dispersed last turn. Not much else to do other than make small positioning moves to adjust fields of fire and deny movement to Russians.
Russians have got to move the infantry up fast, to get the Germans spotted and keep them off balance an in motion preferably off of Board 2. End result of this turn is putting pressure on Hill 129.
Turn 5
Germans are facing trouble on Hill 129. They can can stay and fight, and reduce the size of the Russian force, at some cost to themselves, or they can cede to a more defensible position at the expense of losing a 120 mm mortar, and positioning. Best to cede the hill, maintain winning conditions.
Russians eliminated the German 120 mm mortar, as expected. Then more positioning. The clock is running out. This is a hard scenario.
Turn 6
At some point the Russians will have to force a massive attack. The key for the Germans is making that as expensive as possible. At this point, since the Germans occupy the key real estate, there is liitle they can do other than make Russian attacks very expensive, and reposition to deny Russian fire advantage.
Russians having spotted to fire on, and there are no Germans in the clear. Time to get busy.
So, yeah, it’s unrealistic, but for purposes of game play, T-34s really need that extra speediness to get around the battlefield. The idea is to try and force the Germans off of Hill 132 or out of Golod by end of game, leaving enough unit down south of Bednost to keep the Germans bottled up.
It’s interesting that Germans move relatively few pieces, while the Russians tend to move most of their units.
Turn 7
The Germans can’t do much more than sit tight and wait for the inevitable onslaught Russians.
First, rectify a major blunder: tanks in woods on Hill 132 should have fired on T-34s on south slope of Hill 129 several turns ago. It was a Russian blunder to leave these exposed! Since theT-34 is on a hill, it’s 1:2, roll 1, dispersed. Now move a Panther into position to combine attacks next turn for a kill.
Since the Germans are going to take casualties, the tactics now serve to limit casualties to low attack strength units such as halftracks, emplaced to deny Russian post-attack advantage. That is, the Russians will eliminate those units, but, hopefully, gain no further tactical advantage.
Russians are set up to first get pounded, then blast the Germans back big time. It just occurred to me, though, the German only need go for dispersals, but theRussians need kills. This is a Big Deal for game play. In any case, after a nasty roll 6 on a 4:1 (defending halftrack in forest), Russians managed to collect a few more halftacks which the Germans put out to deny terrain.
Turn 8
Germans whiffed a 3:1, T-34 in woods hilltop. Now, the decision is either stay and fight and probably lose the Wespe, or run and hide.
This round, run; consolidate positions on Hill 132 and Golod. Give up Hill 129.
Russians knock ATG in woods south of Golod, as expected. Also knocked off an SG III-75 with CAT which was a blunder on the Germans. Another CAT got a dispersal, which is going to be a kill next turn.
Turn 9
Germans need to knock off a couple of Russian units, else they’re going to lose. So, two trucks eliminated, which will hurt the Russian count.
Russians take out a tank and a half track, then make the huge move to surround Golod.
Turn 10
Here’s the situation at the top of the Turn 10:
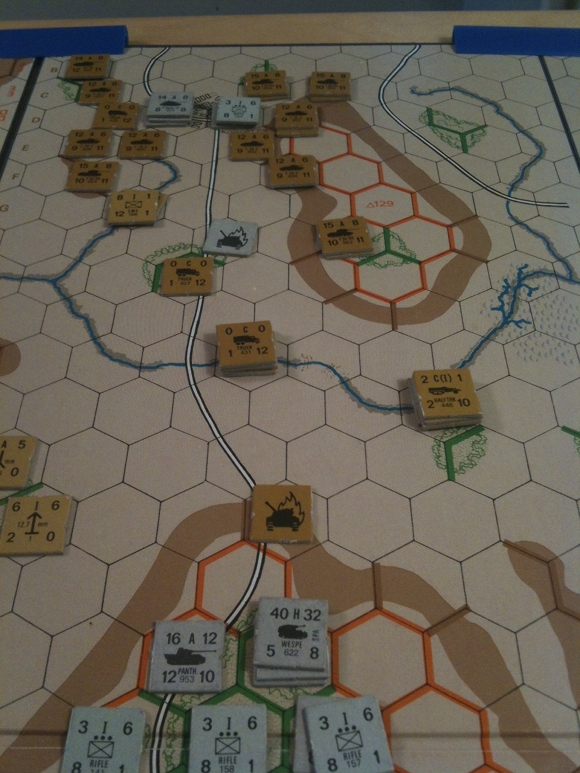
This illustrates the essential difficulty of Situation #7: the Germans don’t really need to do anything except avoid fighting.
Because this was a solitaire game, I decided that the Germans would stay and fight instead of running around the north end of the Russian units.
Germans whiffed a 3:1, which will be costly as it leaves Golod fully spotted, but did follow up a 2:1 dispersal with a 1:3 CAT for a kill. And, Lo! A Panther from Hill 132 disables the T-34 spotting, leaving only the east part of Golod spotted.
Russians got some big kills including the Hummel on this last turn as a couple of rifle companies made a close assualt on the south side of Bednost. This was a total German blunder and didn’t need to happen.
A definite Russian blunder in deploying spotting units left the west half of Golod unspotted, leaving a three stack of Germans at 4:1 covered from fire. Bummer for Russians. However, the units in the east side of Golod were eliminated.
AAR
Final count: Germans 17, Russians 46, which is a marginal Russian victory. To be fair, the Germans probably lost 3-4 units by choosing to stay and fight rather than bailing out, and they definitely missed a few critically important opportunities for for fire, which would have knocked the Russians back 2-3 units, at least. In short, this felt well-balanced to me, but that’s probably because I don’t have much experience.
After this first game, my impression is that this is the most “chess-like” situation yet. At the end of turn 6, The Russians were down only one unit, the Germans two, and losses for both sides were definitely blunders. Of particular note, the Germans ultimately had to cede ground to stay out of nasty attrition firefights.
A tactic which occurred to me is how to force the Germans into nasty close combat situations by forcing them to either stay spotted by cheap deadly ATG guns, or feel compelled to overrun into the clear.
This is where combat rule forcing the attack on the weakest unit can also be employed.
On the other hand, the Germans could use more indirect fire by placing the Wespe and Hummel way off Board 2. They might not end up counting for victory, but it might not matter.
Here’s a good tactic: when faced with a large choice of potential targets, position such that a dispersal shot on one turn allows repositioning friendly units to fire for a kill on the next.
Blunders
German left a Panther exposed to overrun, which was completely unnecessary.
Violated Russian stacking conditions on a truck/infantry colocation: there was already a unit in that hex.
Russians not using either infantry or SU-152s effectively. They need to come up the middle road on Board 1 at the start, movement 7 just gets them bogged down in the hills and swamps anywhere else.
SG III-75 in woods on Hill 132 should have fired on T-34s on south slope of Hill 129 several turns ago. It was a Russian blunder to leave these exposed! Then again, at that range with the T-34 on a slope, it’s 1:2 attack for the Germans.
German movement to deny terrain has to be balanced against whether the unit will survive. If it won’t survive, then there has to be value in having the attacking unit firing instead of moving.
Germans left the Wespe out of LOS on final turn, bad move. This could have taken out a Russian tank.
Leaving Hummel exposed to CAT on last turn!
Balance
One way to investigate a better balanced scenario would be to have the Russians come in from the east and the Germans from the west, opposite of the current scenario.
Alternatively, specify the Russians as having first movement.
By the start of Russian Turn 3, it’s looking really grim for the Russians, specifically, facing a concealed Wespe on Hill 129 makes motion on the north end of Board 3 really problematic.
It might be that having more than 10 turns helps even things out as well.
Another way might be to add a few units to the Russian OOB, or remove a couple from the German, or both.
Victory conditions
The game starts with a de facto German victory, since the Germans start with at least as many pieces as the Russians.
The scenario is designed to force Russian offensive action. The Russians cannot win this with the usual tactic of emplacing unkillable infantry to block German action.
One way to make victory conditions a little more interesting is to require the Germans to hold some real estate. The Germans were able to minimize losses up until they decided to fight, which lost them the game. A better balanced scenario might have a few less Russian tanks, with a requirement that the Germans must hold one or more towns or hills. (This opinion is based on one game, where neither Wespe or Hummel got into play.)