Silver Bayonet 33: 3rd Brigade Take 2
This is our long-awaited full weekend game dedicated to Scenario #9 of Silver Bayonet. We started yesterday and got the predicted 3 turns finished. It’s a 10 turn scenario, but each side has secret automatic victory conditions, which make sense to pursue as they can shorten the game and provide a lot more tension.
For automatic victory, Each player randomly selects two markers numbered 1 through 5 and places these markers face down on the map.
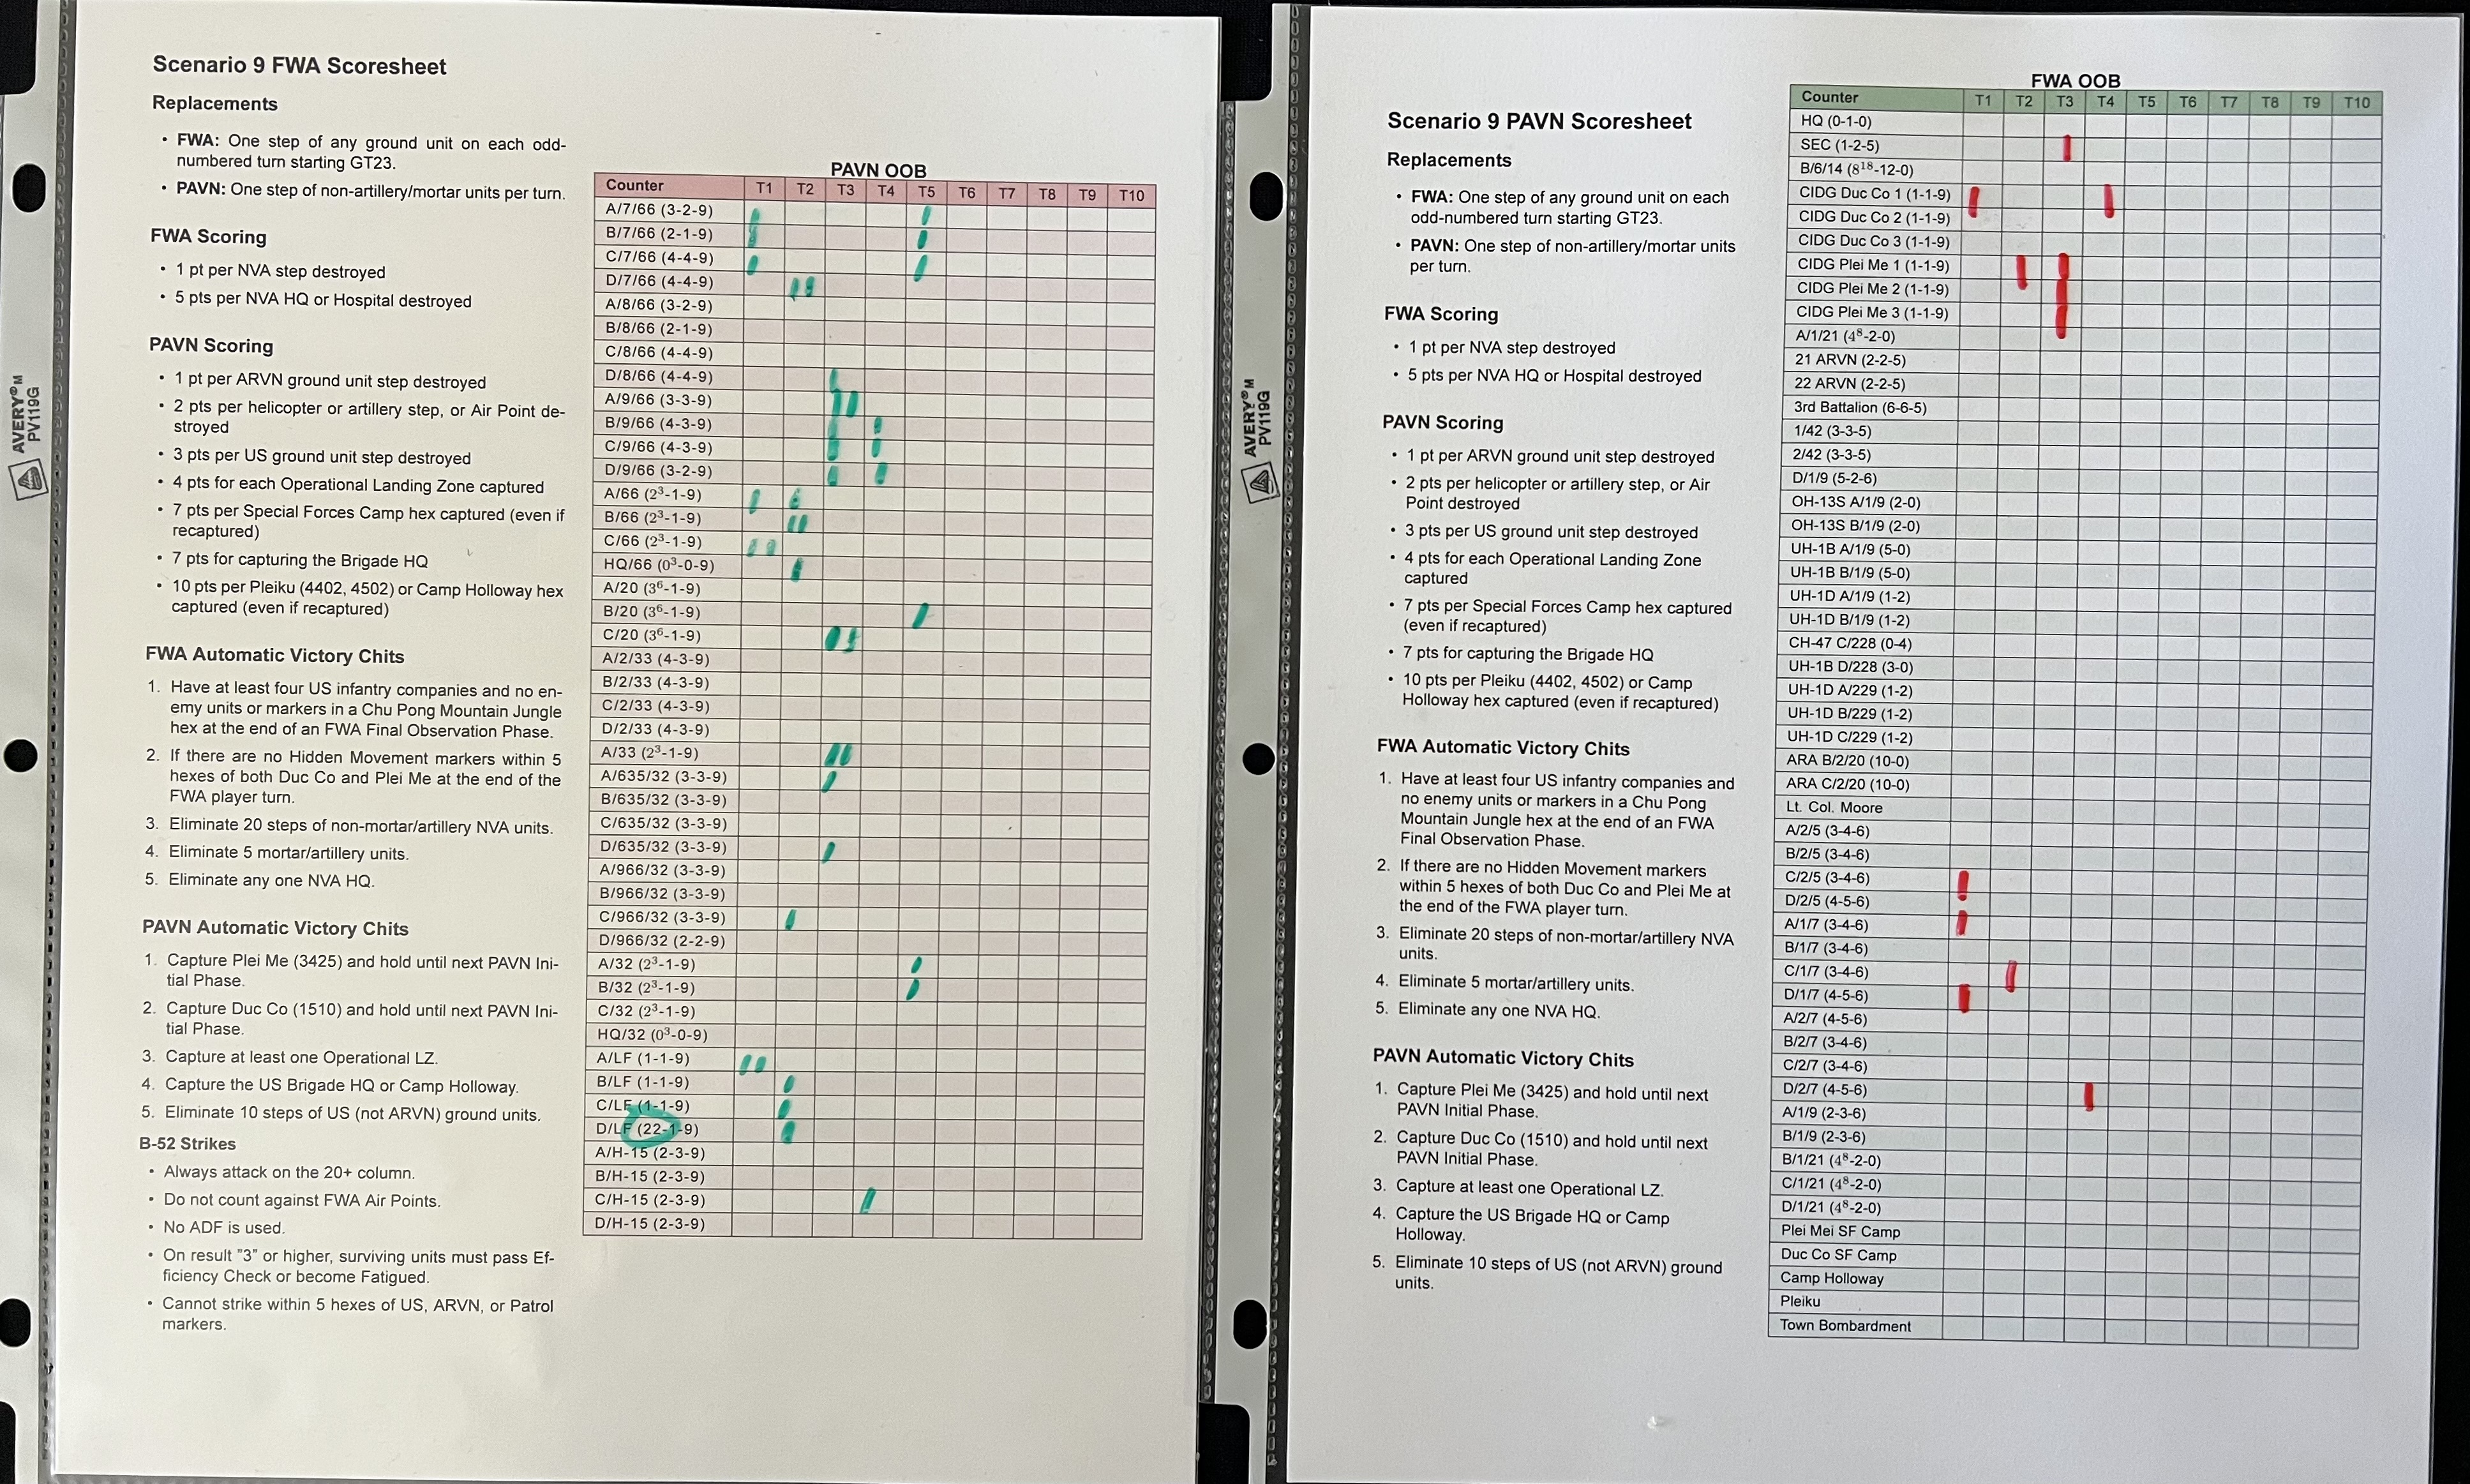
As the Free World Allies player, my automatic conditions to eliminate 5 artillery units, and destroy 20 steps of NVA.
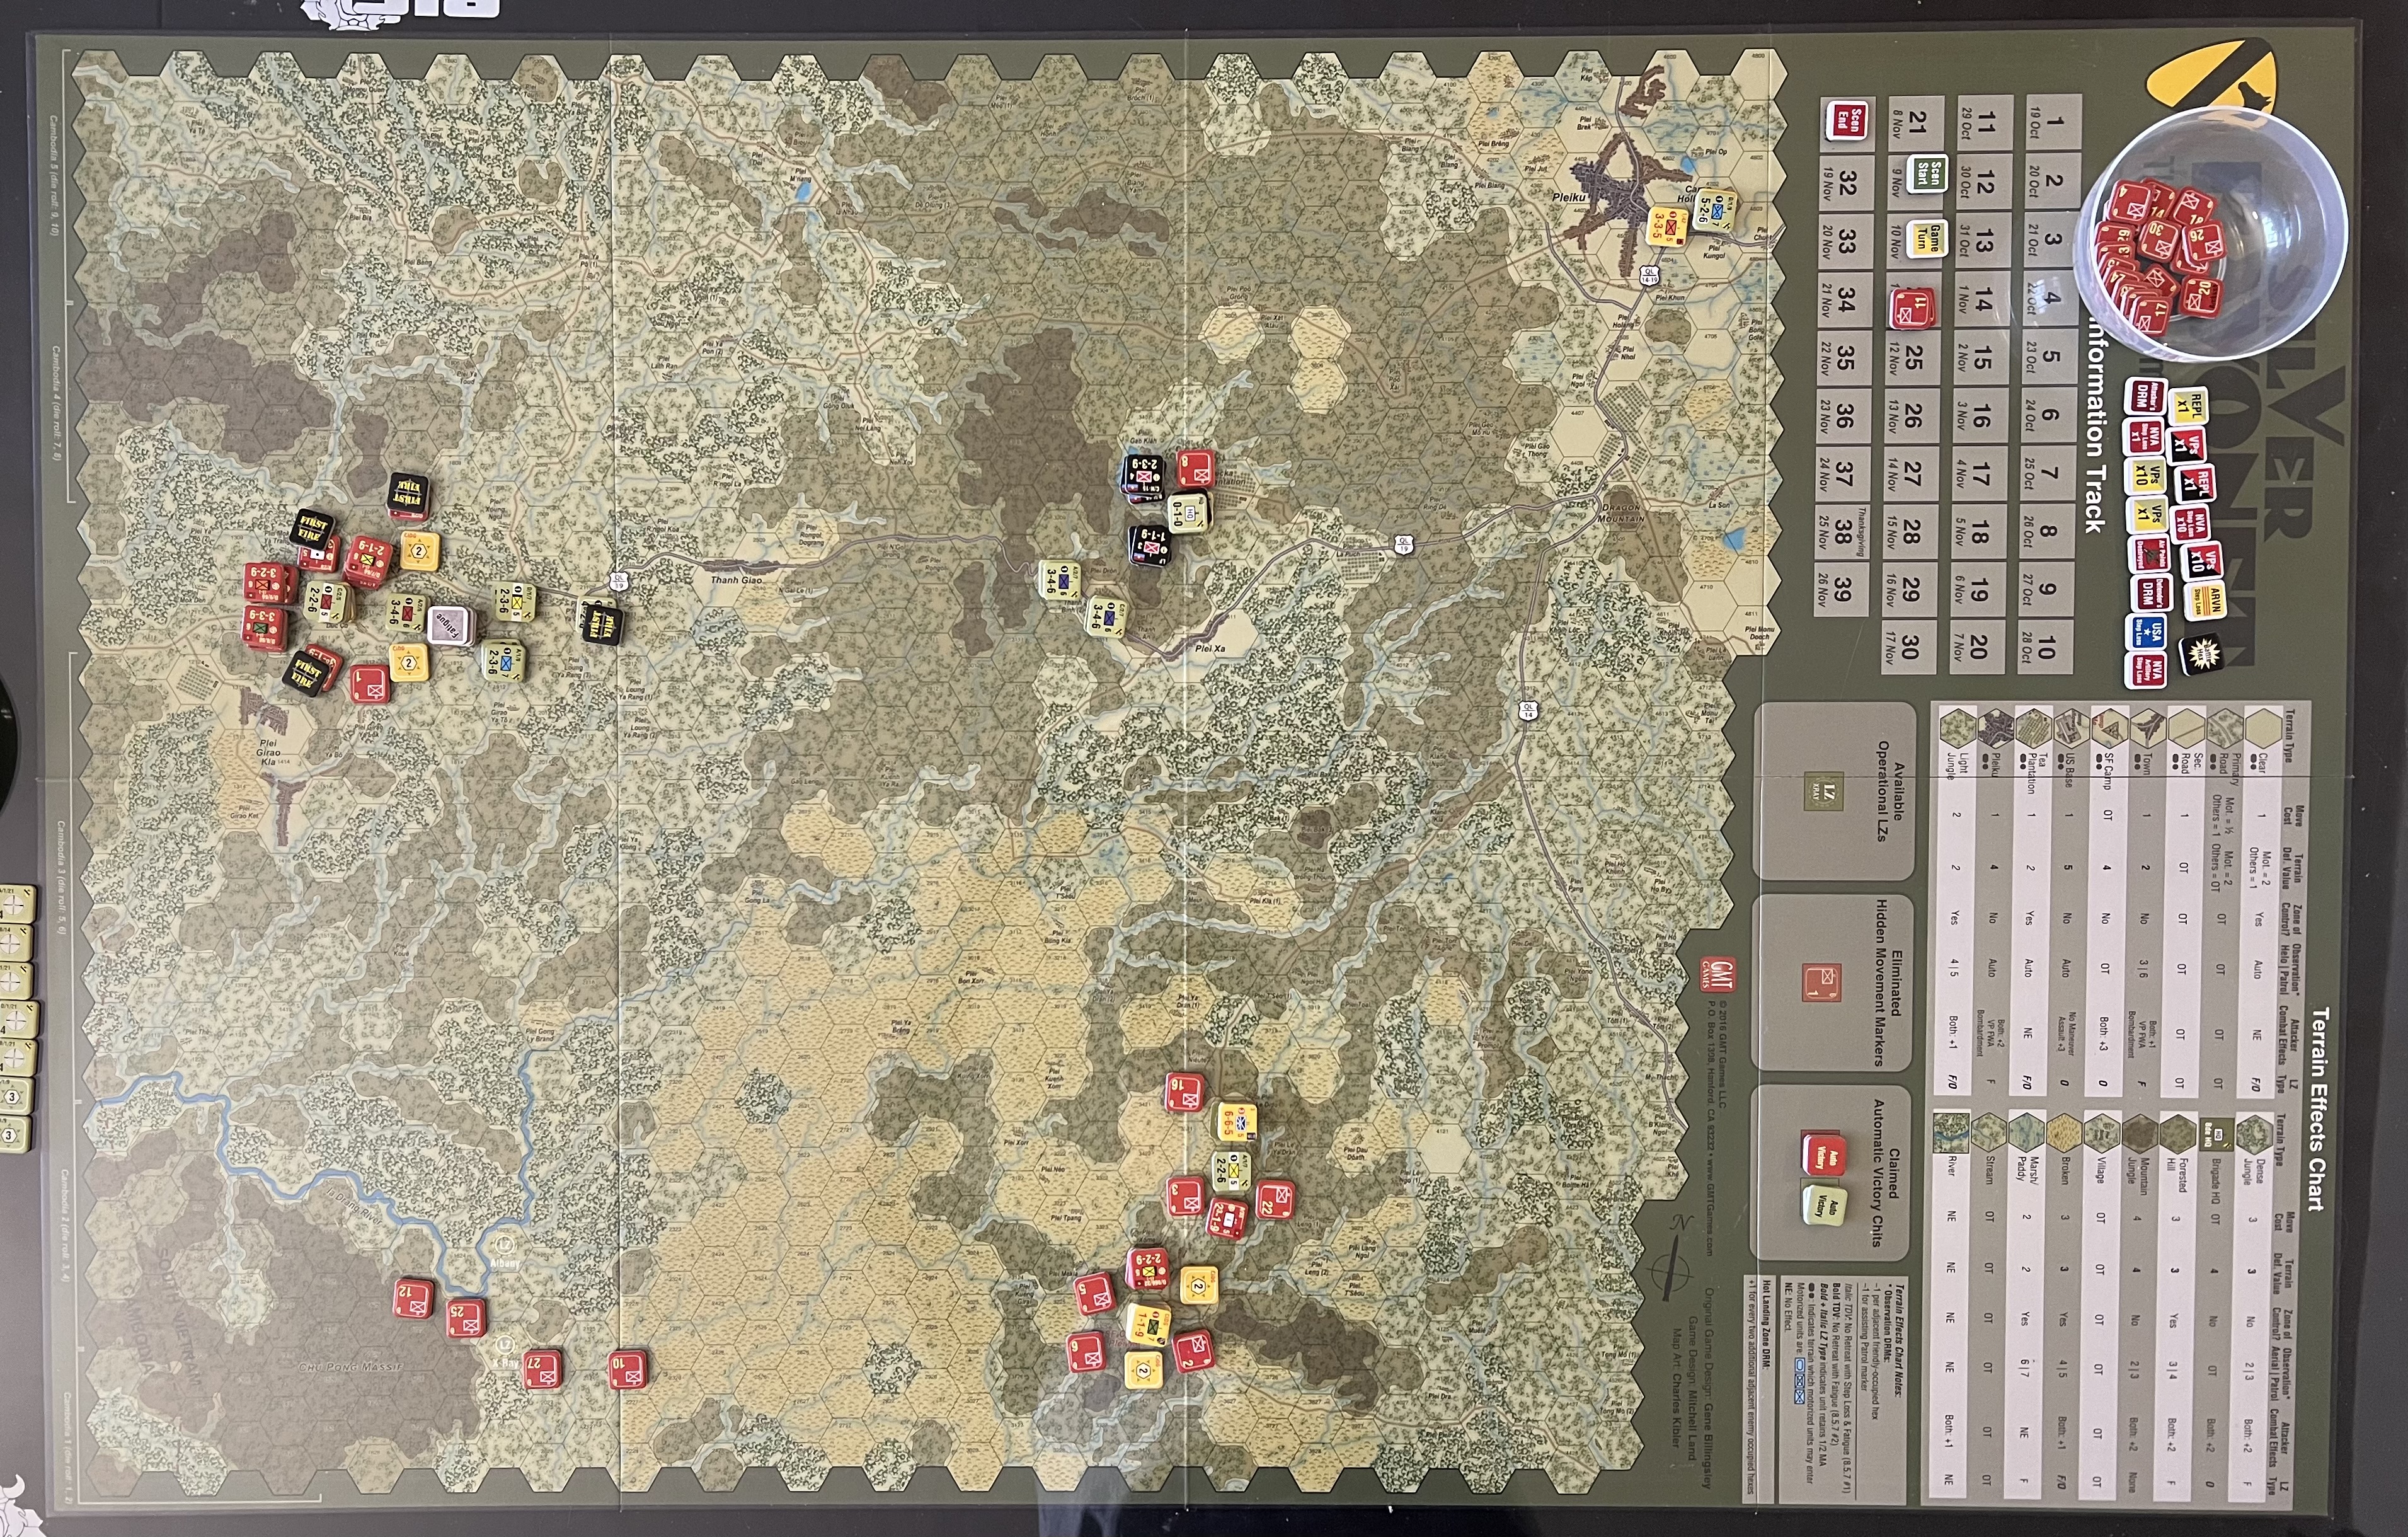
At setup, the PAVN concentrated its forces around the Special Forces camps and the brigade HQ at Cateka.
Here’s the situation at the end of Turn 1:
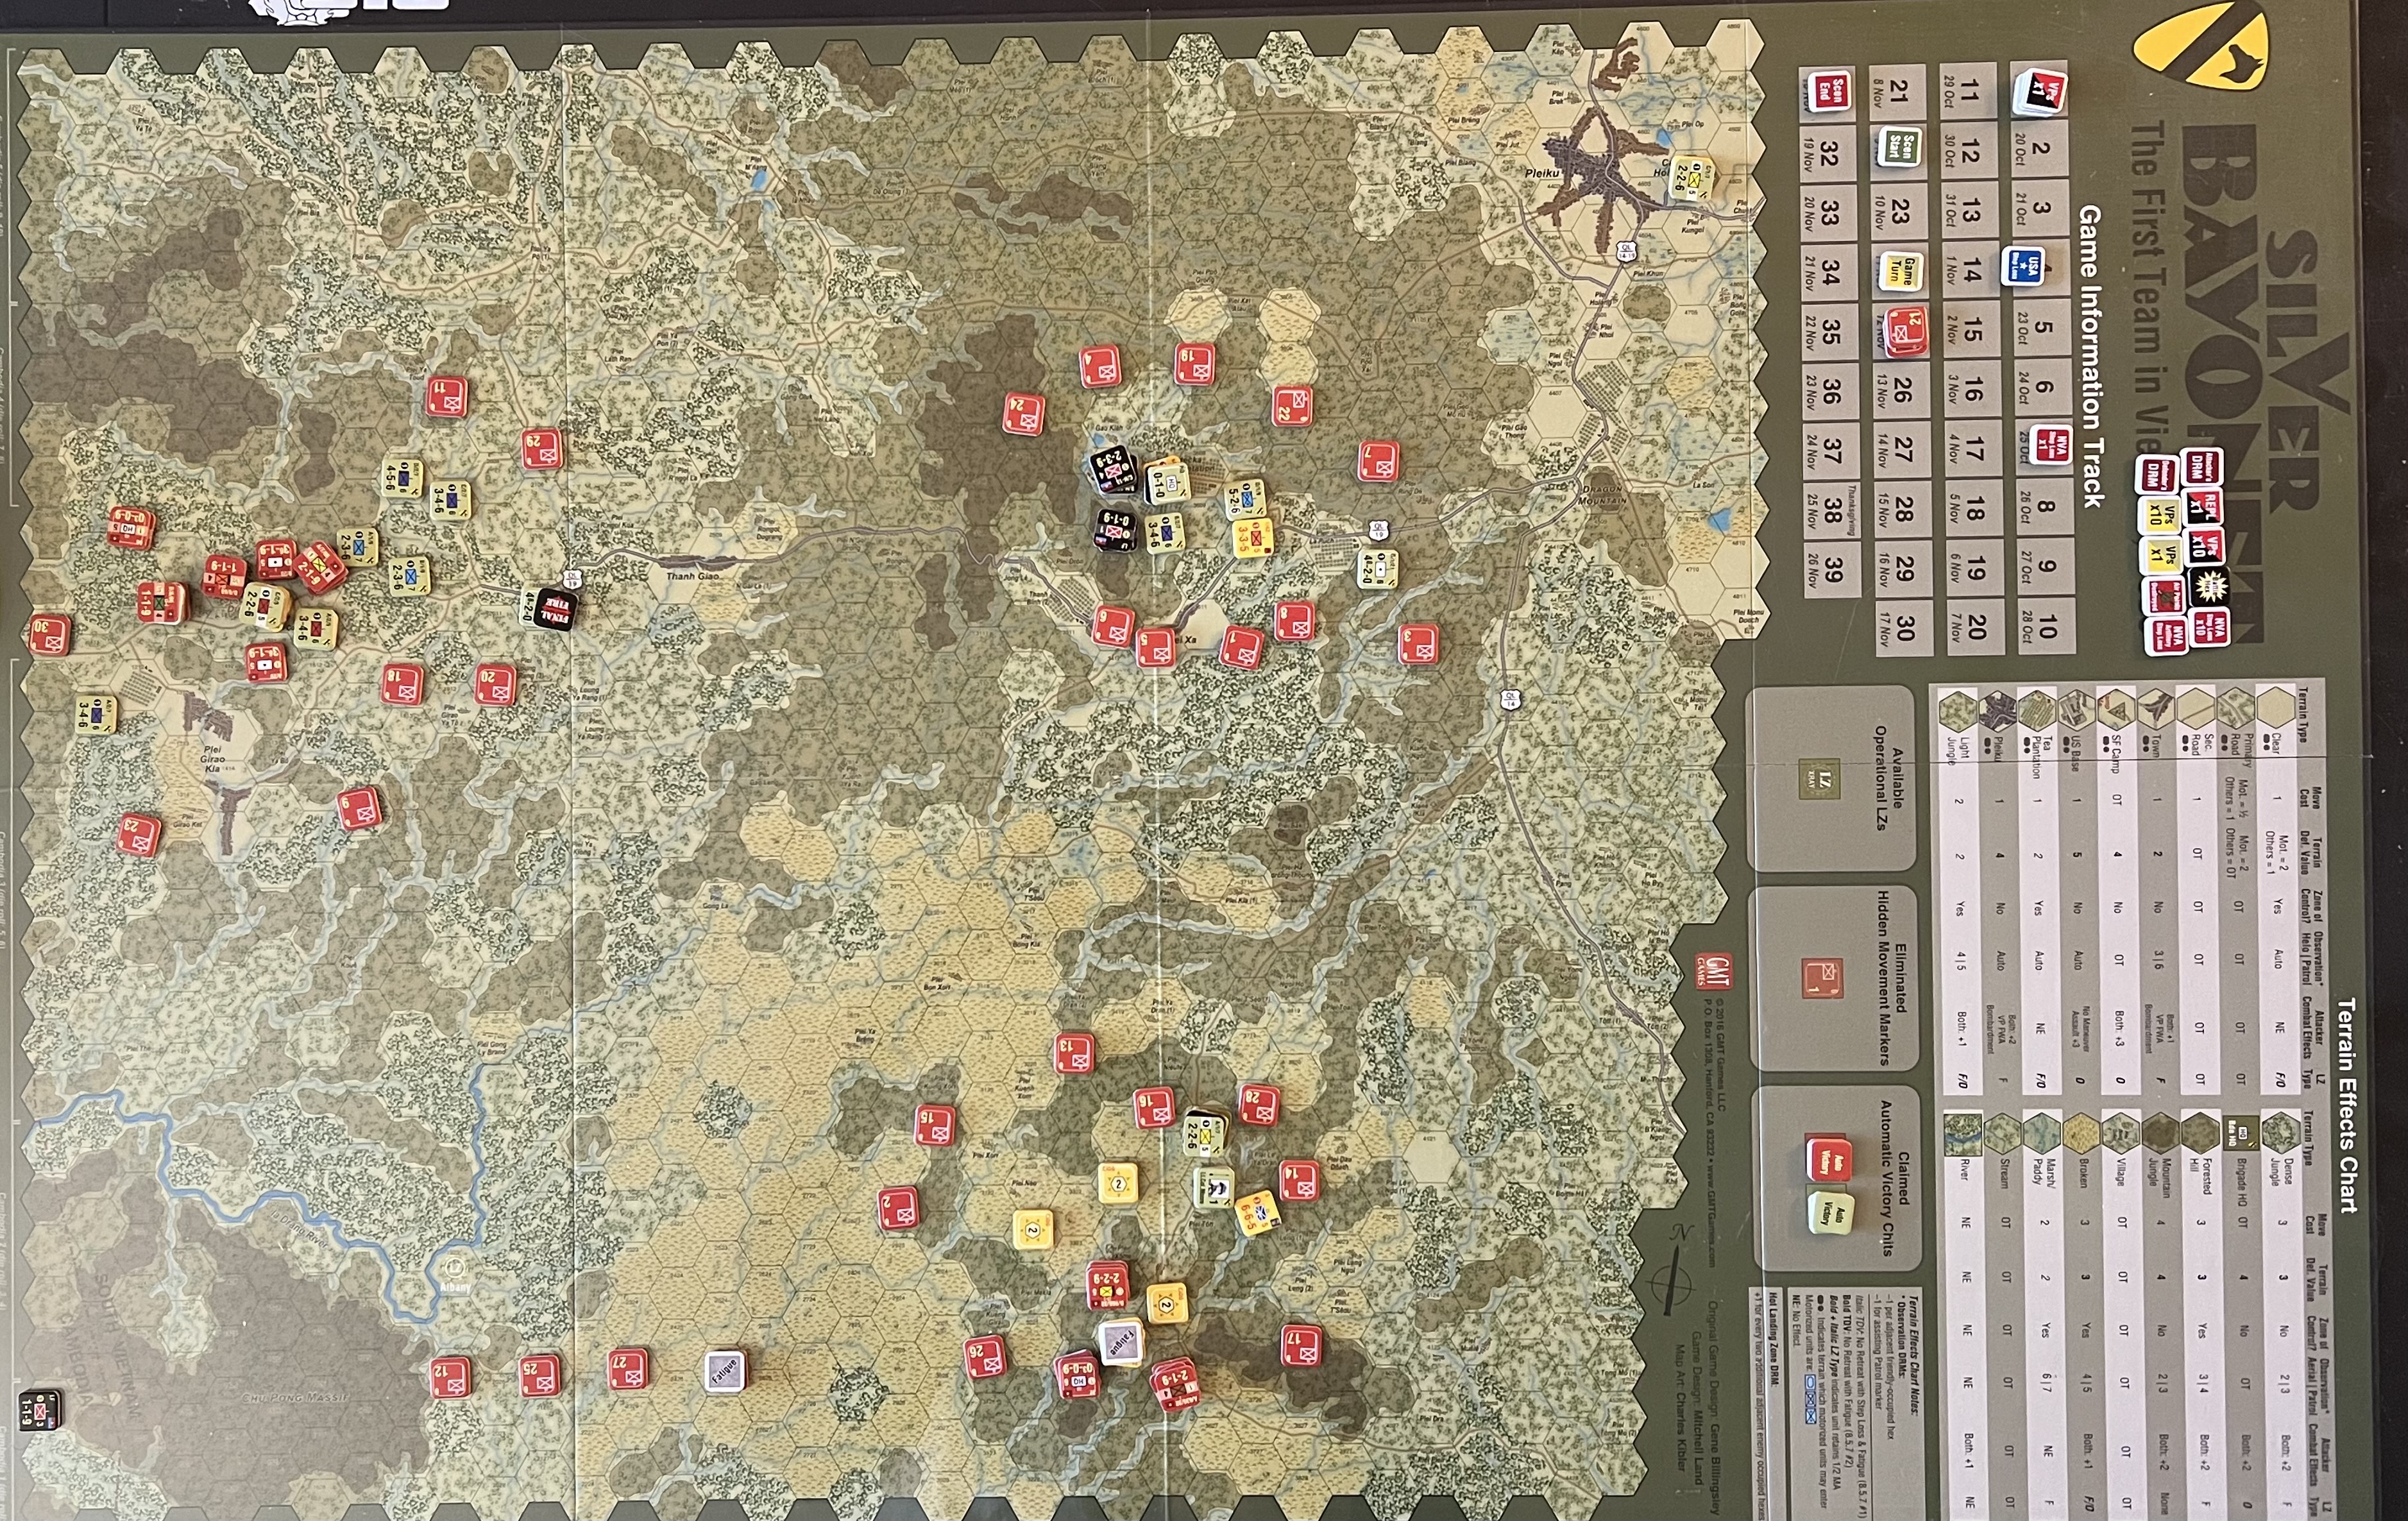
Turns 2 and 3 repeat the pattern established in Turn 1: PAVN continues to hammer on the camps and HQ.
Here’s the situation at the end of Turn 3:
A win for FWA at the end of Turn 5:

AAR
This game was a bit unusual in so far as there was very little ground movement, particularly in the first three turns. All the action was around the SF camps and HQ. PAVN didn’t really do anything with the Hidden Movement markers.
Specifically for myself as the FWA player, I got incredibly lucky by revealing an HQ stacked with 3 mortar sections. One of my automatic victory conditions was “Eliminate 5 artillery units.” This was an incredible stroke of luck, but PAVN had put the Hidden Movement marker on the road east of Duc Co, which I wanted to clear.
The scoresheets I made were really helpful.