StarForce 12, The Rescue Mission (1)
It has been quite a while since I’ve had StarForce on the table, and I’ve been looking forward to digging into the Rescue Scenario for quite some time. It’s a bona fide solitaire scenario, racing a randomized clock.
At the moment, I have it set up and ready to go for a deep dive tomorrow (Labor Day holiday in US).
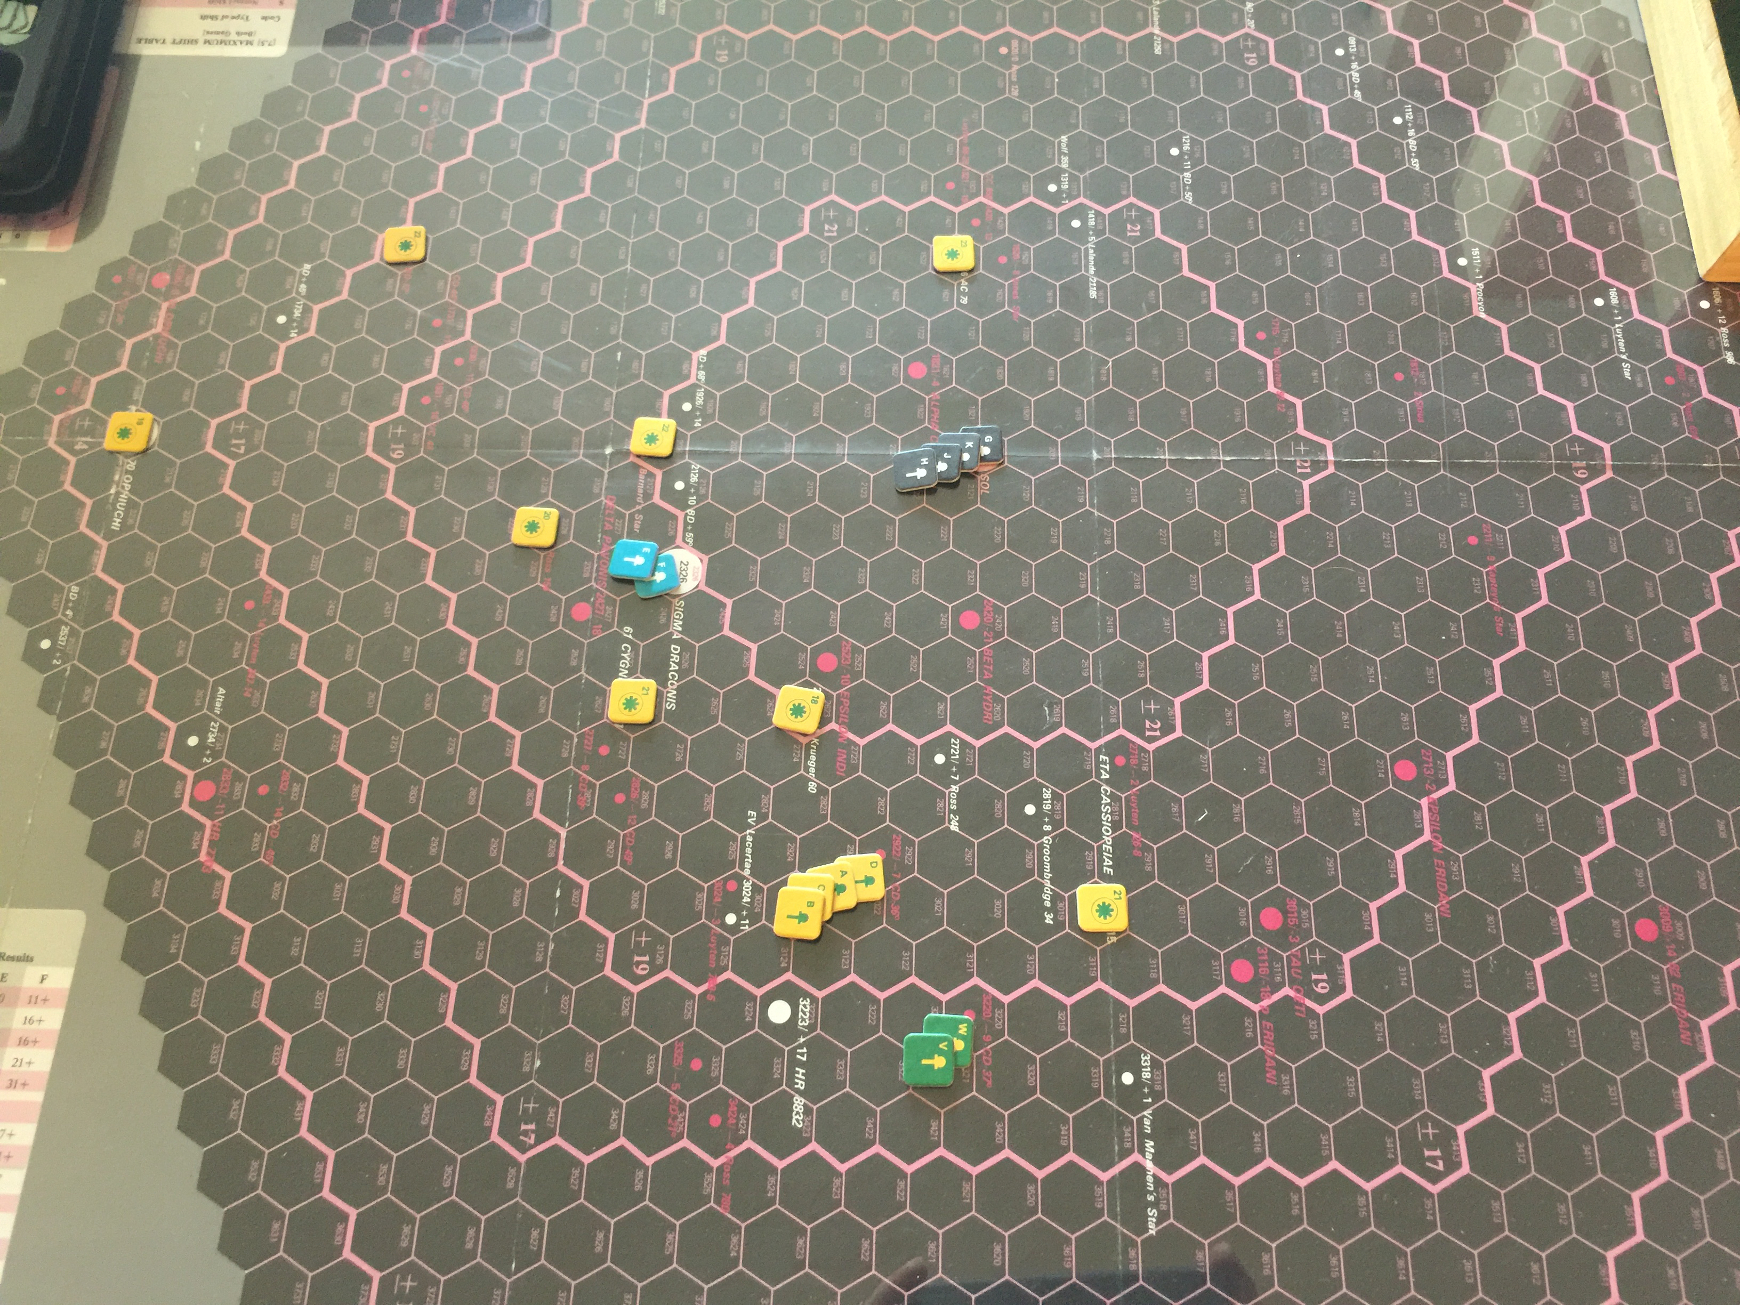
On the table is “The Rescue Mission,” as detailed in Section 38 of the rules. The star going nova is 2922, denoted CD-36 on the map. It’s well-positioned, with a little bit of luck, should be able to get a significant fraction rescued.
At the outset of play, this scenario seems to have a fair bit of replay value. Some of the possible initial starting systems (stars which would go nova) are way out in the boondocks.
I suspect that mastering this scenario will help me do well against opponents, as all the different movement tricks will need to be employed.
Here’s what it looks like:
Scenario-specific rules
The following are provided for the Rescue scenario:
- A star force must begin and end it’s turn in a system to either pick up or offload a group of colonists.
- Each star force carries one Population Point.
- All shifting is allowed.
- Enhancing operations may not be performed by any star force which is loading or unloading. This is probably moot as unloading would be at a system which already has a gate. It might be possible to extend incoming capacity though, by enhancing at 2922.
Abridged turn sequence
From Section 5.0:
- Plot stellar shifts.
- Execute shifts.
- Combat if applicable.
- Neutralization recovery if applicable.
Let’s get started.
Turn 1
I’m going to group various star forces together by originating stellar system to make it easier to manage.
- Sol group (black, G, H, J, K): will shift directly into 2922, it’s less than 20 hexes.
- Nova group (yellow, A, B, C, D) will sit tight for now, onboarding population.
- Green group (V, W) can shift directly into 2922, it’s close enough.
- Dragon group (blue, E, F) can gatelink to a system very close by.
Nova draw: 6.
Turn 2
- Sol group stays put and loads.
- Green group loads.
- Nova group GS to 3424 Ross 780
- Dragon group shifts in to 2922.
Nova draw: 5.
Turn 3.
- Nova group unloads at 3424.
- Green group unloads at 3220
- Sol group shifts to 3024.
- Dragon group loads.
Nova draw: 7.
Score: 4.
Turn 4
- Sol group unload at 3024.
- Green group unload at 3220.
- Nova group moves back to 2922.
- Dragon group moves to 3325-5.
Nova draw: 8.
Score: 10.
Turn 5
- Nova group loads.
- Dragon group unloads.
- Sol group to 2922.
- Green group to 2922.
Nova draw: 3.
Score: 12.
Turn 6
- Nova group to 3424-4.
- Dragon group to 2922.
- Sol group loads.
- Green group loads.
Draw: 0, 0!
Game ends!
Score: 12.
Bummer!
At least this game ended this evening, or I’d have to move the article by date.
AAR
This scenario also reminds me a bit of Leaving Earth, insofar as there is an optimization problem buried in the scenario. In Leaving Earth, movement is very simple, but the logistics of managing the missions are quite complex. Here in StarForce, there is only star forces and star gates to manage, but the movement possibilities are much more involved.