Bloody March Turn 1
Now that it’s a week after my initial aborted attempt at playing Bloody March, let’s give Bloody March another try with the full rule set.
Turn 1
Back to business. I don’t see any way around going through each phase in gruesome detail. That’s the best I’ve found to learn for myself, even if it is the most boring.
FSLN phases
Scenario 1 uses standard rules, all the intervention rules phases are ignored.
-
Supply: all FSLN units in supply, by definition all units are considered to be in supply on the first game turn unless the scenario dictates otherwise. (In the this scenario, the Honduran 4th regiment at Mandasta is out of supply until the start of Game Turn 4). Since there are no Supply Depots available, Communist supply phase is over.
-
Ground unit reorganization: no reorg points, skip.
- Regular Ground Unit Movement: FSLN moves to encircle fortified
position. Note that this is only the regular forces, insurgents
can move on this phase as regular units, or the next phase as
insurgent units. Details:
- NI 50-02 X moves from 2311 to 2310 Las Trojes. This is within the ZOC of the FDN forces on 2410 (Las Vegas), so it requires the entire movement allowance (normally 4).
- NI Lopz X moves from 2511 to 2510, again, a single hex due to FDN ZOC centered on 2410. This concludes FSLN regular movement.
- Insurgency Movement: as it turns out, I could have just moved the
current insurgents during regular movement phase, as I don’t need to
leverage the “insurgent reserve.” But since I didn’t move them during
regular movement, I’ll move them now:
- NI Pom II: from 2511 to 2510. I could move further as insurgents aren’t bound by ZOCs, but that’s where I want it anyway. Insurgency Reserve status marked. Note that the insurgent unit doesn’t have to pay normal movement costs.
- NI Uman II: from 2411 to 2310, leveraging the ability to move through the Allied ZOC with impunity. Insurgency Reserve status marked.
- Insurgency Placement: I think this is a good idea, because FSLN have
only 2 insurgency points against FDN 4, and needs to get as much combat
as fast as possible:
- First attempt is to emplace regiment of MRH (an attractive yellow colored counter). Costs 1 insurgency point to make the attempt. Die roll 4, +1 for placing in home country, success for forest placement at hex 2411.
- Since insurgent units are considered support units for stacking purposes, let’s try to place another one at 2411: Die roll 5, success and an MRP unit enters the game.
Neither of these units can move this turn, but they can fight.
-
Allied Aerial Counterinsurgency: The successful placements are bad for the Allies. Unfortunately, 3 Bombardment points are necessary to undertake an Aerial Counterinsurgency, so the CIA helicopter stays home (in Silca).
-
First Insurgency Disbandment: will keep insurgents this turn for fighting.
-
Air Mission: no air assets for FSLN in this scenario.
- Ground Combat: FSLN attacks FDN in fortified postion 2410:
- Attacking:
- (2) Lopz from 2510
- (2) 50 02 from 2310
- (2) Veng from 2411
- (1) Uman 2310
- (1) Pom from 2510
- 8 total attack
- Defending FDN from entrenchment:
- (2) Leg
- (2) Cim
- 4 total defend
Odds 8:4, 2:1, roll 3, -2 DRM defender advantage for fortification, +1 DRM for attacking insurgent, result 2 yeilds attacker step loss with no retreat. That’s actually not bad. Veng takes the step loss.
Note that I’m assuming that the entrenchment forces combined defense as a stack. If this is not the case, a better attack would be 4:1, which would give a 2/3 chance of defender step loss and retreat. In this case, that would be an elimination. Except! Defenders in a fortification or entrenchment can ignore retreats.
Rules clarification: Each of these units may be attacked separately, but they both have to be attacked. That is, the rules specify that if a unit in a hex is attacked, all the units in that hex must be attacked, but each unit may be attacked independently.
A better attack may have been to attempt to get a 3:1 on one unit and a 1:1 on another. This would have almost certainly resulted in an attacker step loss (perhaps more than one), but it would have a higher probability of a defender step loss as well.
- Attacking:
-
Reserve Movement: Since the FDN Leg and Cim units have only 1 AF, I’ll move the NI Uman from 2310 and Pom from 2510 to 2409, which will be punishing on FDN supply next turn. Reserve markers removed.
-
Second Insurgency Disbandment: keeping insurgents this turn.
-
Helicopter Transport: FSLN has no helicopters in this scenario. Bummer.
-
Return to Base: no helicopters.
- Reinforcement: No reinforcements.
FDN phases
-
Supply: Turn 1 all units considered in supply unless dictated otherwise by the scenario.
-
Ground unit reorganization: No reorganization points.
- Regular Ground Unit Movement: The FDN Leg and Cim regiments need
to stay put in Las Vegas, that’s victory ground after all. This leaves
the Honduran unit:
- HN 4 moves 2 hexes along road from 1811 to 1910.
- Insurgency Movement: the Salz, Sjec and Seg insurgent units:
- The insurgents move from 2612 to 2511, reserve marker placed.
-
Insurgency Placement: Definitely need some insurgents here. FDN has 4 points to spend:
- First attempt, emplace FRDA at 2511. Roll 1, +1 DRM for home country, unsuccessful. Down to 3 IP. Try again…
- Second attempt, emplace Qui at 2511, roll 1, unsuccessful. Again…
- Third attempt: MLN at 2511, roll 1, no dice.
- Fourth attempt: Cond at 2511, roll 6, success.
Well, that surely sucked for the Allied forces, considering the +1 provided about an 83% chance of success. Three 1s in row. Sheesh.
-
FSLN Aerial Counterinsurgency: ain’t got no wings, so there’s no aerial counterinsurgency.
-
First Insurgency Disbandment: not disbanding any insurgents this turn.
- Air Mission: FDN has CIA helicopter support. How shall these allows
employ this asset? Three options for this bird:
- Air to ground combat, seems to be covered by the Bombardment rules.
- Close air support, requires ground combat on same target.
- Transport.
In this case, close air support of ground combat is warranted. Since there is no other air asset, a +1 Close Air Support marker is placed on Lopz at 2510, as this is the unit coming under Allied attack.
- Ground Combat, one attack, as follows:
- On the attack:
- (1) SJec from 2610
- (1) Salz from 2610
- (1) Cond from 2511
- (1) Cim from 2410
- (1) Leg from 2410
- (1) CIA helicopter
- 6 Total
- Defending:
- (3) Lopz at 2510
Odds 6:3 yeild 2:1, defender is leg unit in forested terrain, roll 2, +1 for Close Air Support, +1 for insurgent unit attacking, one column shift right for attack helicopter, from CRT value 4 yeilds
-/1,Rdefender step loss and retreat to 2408. Not bad, Lopz is a powerful unit.Attacker chooses not to pursue, as the leg units would be giving up a lot of defensive strength in the entrenched hex, and insurgency reserve move can occupy that area anyway.
- On the attack:
- Reserve Movement:
- SJec and Seg from 2610 to 2510
- Salz from 2610 to 2511
-
Second Insurgency Disbandment: Keeping the single unit activated.
-
Helicopter Transport: mission already flown in CAS.
-
Return to Base: helicopter back to Silca.
- Reinforcement: no reinforcements in this scenario.
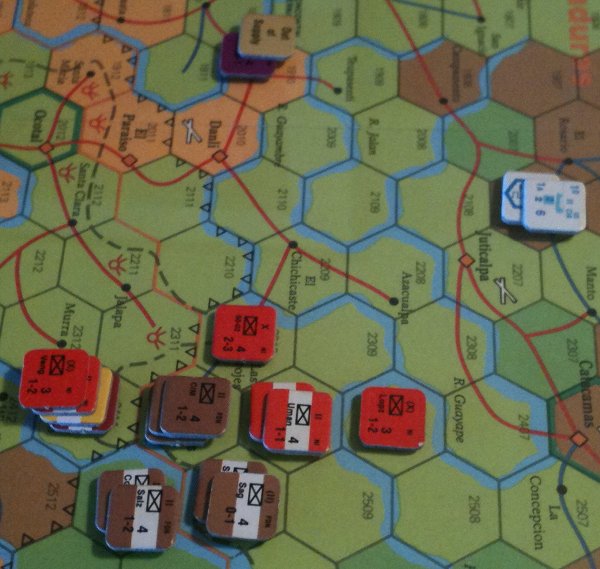
Ok, that’s it for Turn 1, and we’re talking hours of work. Here’s a snapshot, blurry from mobile phone but still useful:
Score: FDN 4, FSLN 0.
This is the FDN’s game to lose, by dint of setting up on the Las Vegas village for 4 VPs.
Play continues with Bloody March Turn 2.