Recon Team: Vietnam
(Note: game started 2024-11-17.)
Recon Team: Vietnam is a print and play title from Berserker Games. I have had this printed out for years, but the form factor is so unusual it’s been difficult to summon the energy to unscramble the rules. I suspect at heart it’s a fairly simple game, but extracting that simplicity is a challenge.
I also did not completely prep the game for playing at the time I printed it. I suspect my enthusiasm waned pretty quickly when confronted by the amount of work it was going to take to render the printed material playable.
Running a mission
The overall sequence is as follows:
- Draw Mission Card
- Logistics Phase
- Operations Phase
- Mission Completion Check
- Victory Point Calculation Phase
- Soldier Replacement Check Phase
Each of these will be examined in more detail as the first game plays out. We’ll start with determining a mission.
Draw Mission Card
The mission cards are small, but double-sided. I actually like the size, I do wish they were a much closer fit standard small sleeves, that would be super cool.
Each Mission Card has a mission title and a standard layout with the details for conducting a mission. Here is an example for a PHOENIX OP mission:
- Set-Up: Place Leader Objective and 4 Decoys in Hexes: A3, B3, B5, D4 and E4.
- Mission: Kill or Capture
- Leader Objective for 5VP.
- Operations: 10
- Team Size: 5 (1x\(\bigoplus\) ,1x✴ ).
- Insertion: Helicopter.
- Support Points: 8
The Team Size also defines requirements specified by icons which have the following meanings:
- 1x\(\bigoplus\) means there needs to be at least one sniper on the team.
- 1x✴ means at least one intel team member.
The rules on platoon formation are not completely clear. For this mission I’m going to separate the various specialists as directed by the rules, draw one of each specialist required for the mission, then draw the remaining 3 randomly.
On to logistics.
Logistic Phase
With 8 Support Points, there’s not a lot of slack here, especially when Extraction, Fire Support, and Medevac have to be specifically paid for. That seems very odd at the scale of an individual team. Normally that would budgeted at the command level. For Force Recon, that would be a responsibility of the Force (MEF) commander.
Anyways, let’s budget:
- 1 for extraction
- 1 for medkit
We’re not carrying any extra equipment. This leaves 6 for either Victory Points (VPs) or fire support or whatever.
Now we can start operating.
Operations Phase
The Operations Phase repeats each step until the operation is complete or another event ends the operation. We’ll play this learning in a series of “operational rounds.”
Round 1 Insertion
Helicopter Insertion is covered in the reference sheet on the top of Sheet 3. I’m going to insert in hex H3, which is a paddy.
- 7 hexes for movement, event on 1D6 = 1, no event.
- LZ roll 2, which is Ho LZ, roll 2D6 for 9, which is a roll on the Combat table, roll 4 for no effect. Squad unasses the helicopter, which moves back to base.
Here’s the situation:
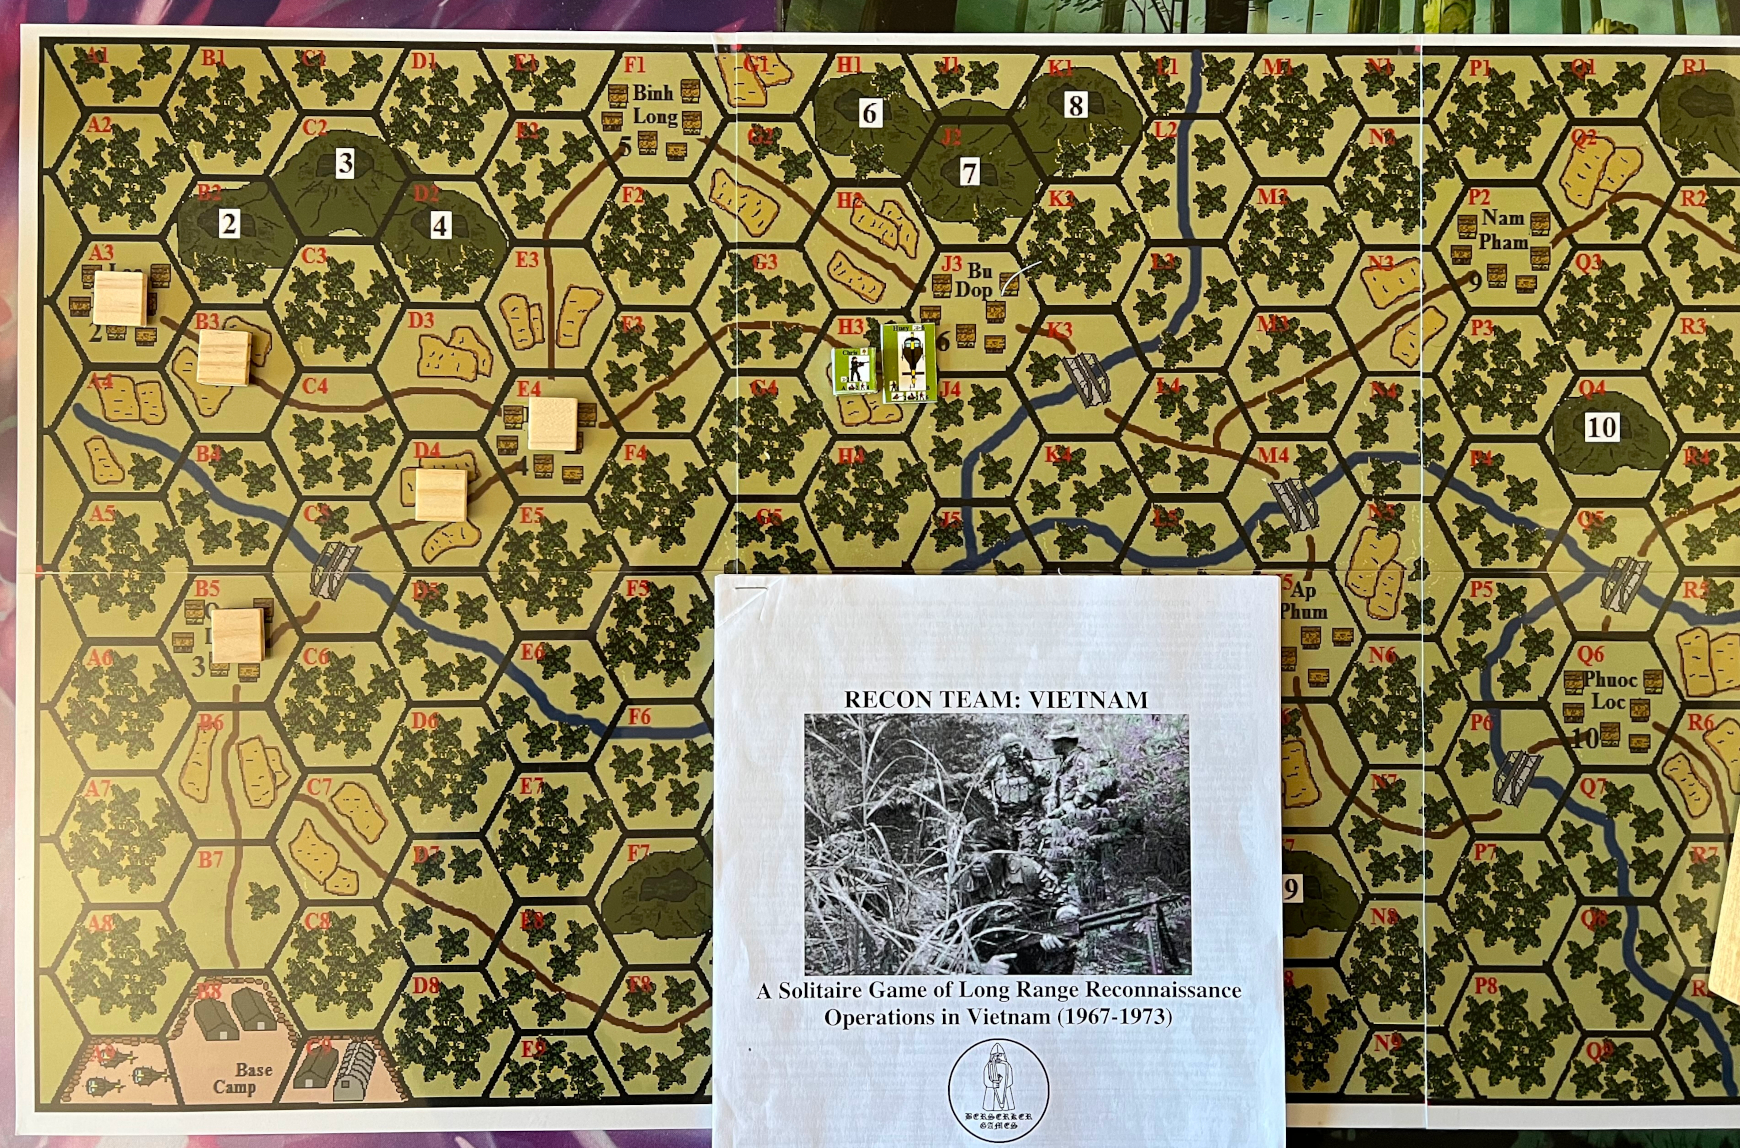
Time to move:
- G4, Jungle, roll 3 no event.
- F4, Jungle, roll 4 no event.
- E4, Village with Objective, roll 5 for no effect, Objective is a decoy,
For Combat, assume D3, roll 1, +3 for 4; enemy drawn randomly:
- 4 VC units: 3 x C, 1 x D. All have Attack 4 for 16 total.
- Team Attack value is 25.
- US initiative, roll 7, D. (Is this applied to the defenders as a whole, or to each defender, or to just one defender?)
- Damage table:
- VC1: C, D, 8, E
- VC2: C, 12, D2, 12, E
- VC3: C, 6. D-1, 8-1 = 7, HC
- VC4: D, 9, D1, 6+1 = 7, E
Return fire:
- Vimy: 12, D1, 10+1, E
- Otto: 8, D, 3, I
- Alex: 10, D, 6, LC and 6 to withdraw
- Chris: 4, no effect?
- Barry: 7, D-1, 6-1 = 5, LC no effect.
Leader Objective
- D6 - 2: roll 3 - 2 = 1 unit with him.
- Otto is sniper, attempts a kill shot, roll for E.
- What happens to OpFor now?
- Can sniper preempt initiative?
- Initiative rolls:
- Leader 2, 3 Team: 5, sniper kill.
Leader is killed, now it’s time for extraction: roll 8 AA fire in 2d hex. roll 5 for no effect.
Victory Points:
- VC eliminated: 3
- Leader eliminated: 3
Total: 6.
Not great, but ok.
AAR
I enjoyed this more than I thought I would, and I am definitely going to play it at least once more, and probably several more times. It’s inspired me to get Thud Ridge printed as well.
I do have questions:
-
What’s the best way to understand how turns or rounds are structured? This single playthrough didn’t give me enough context to figure it out.
-
What happens to the helicopter post insertion? I’m thinking it goes back to base without effect as it would fly very high outside of small arms range, might attract AA though. This game I just moved it back to base.
-
I am not clear on the combat sequence, and need to review my correspondence with the designer to ensure my questions about it were clear. The main thing is how results are applied, whether once against the entire team or OpFor, or individually.
And onward to the next play!
Everything below line is from the rules, above line is game play.
The Player conducts the following actions in the sequence below for each of their Forces. - Up to 25 Stacking Points worth of Units can occupy a Hex. These units make up a Force that can move together. - Each Force follows steps a-d below separately. If desired, you can use the Soldier Team ID Counters to represent your Soldier Teams on the map.
a. Move Force A Force may move a number of hexes up to its lowest movement value. Foot Units may load or unload from Vehicles/Helicopters freely. - For each hex entered, a Force must refer to the Events Table to see if an Event Occurs. - If a Force does not move, roll a D6 on the Terrain Chart for the Hex type occupied to see if an event occurs, ignoring any references to movement.
b. Resolve Events If an Event occurs while a Force entered a new Hex or remained in its current Hex, roll on the Events Table and resolve it as instructed.
c. Conduct Combat Round If Enemy Units are present in the same Hex as a Force, conduct a Combat Round (See Combat Rules Below).
d. Special Actions A Force may conduct any number of the following Special Actions once: - Resolve Objective: If in the same location as an Objective Counter, flip it over and resolve. - Load / Unload Vehicles/Helicopters: Foot Units may Load or Unload Vehicles or Helicopters. - Request Fire Support: Roll a D6 + 1D6 per and select any results of any type available: - 1 None - 2-3 Artillery (2SP) - 4-5 Gunship (3SP) - 6 Airstrike (5SP) - Request Med Evac: If your Force has Casualties and is located in a Paddy, Village, River, or Bridge Hex, you may spend 1OP and 2SP to request a Med Evac Helicopter. - Medic Action: If a Force has wounded Soldiers and any Soldiers with the ( ) Skill, you may spend 1OP to provide Medical Attention (see rules below).
MISSION EXECUTION SEQUENCE
(Here is a complete execution sequence for future convenience.)
Player performs the following in order:
-
Draw Mission Card Player draws a Mission Card and places Objective Markers as instructed. Also, place the Operations Turn Counter next to the Map with the “1” facing up.
- Logistics Phase
Player assembles the Units listed in the Briefing and purchases any Support
Units or Equipment with available Support Points (SP).
- Once all support Units and equipment are purchased, the counters must be placed accordingly while observing the 25 Stacking Point per Hex Limit.
- Soldier Counters are organized into Teams (see box above) and placed in any of the Base Camp Hexes.
- Boats are placed in the hex adjacent to the Base Camp with the Boat symbol.
- Helos are placed in any Base Camp Hex.
- Any remaining SP can now only be used for Fire Support or Med Evacs.
- Operations Phase
The Player conducts the following actions in the sequence below for each of
their Forces.
- Up to 25 Stacking Points worth of Units can occupy a Hex. These units make up a Force that can move together.
- Each Force follows steps a-d below separately. If desired, you can use the Soldier Team ID Counters to represent your Soldier Teams on the map.
a. Move Force A Force may move a number of hexes up to its lowest movement value. Foot Units may load or unload from Vehicles/Helicopters freely. - For each hex entered, a Force must refer to the Events Table to see if an Event Occurs. - If a Force does not move, roll a D6 on the Terrain Chart for the Hex type occupied to see if an event occurs, ignoring any references to movement.
b. Resolve Events If an Event occurs while a Force entered a new Hex or remained in its current Hex, roll on the Events Table and resolve it as instructed.
c. Conduct Combat Round If Enemy Units are present in the same Hex as a Force, conduct a Combat Round (See Combat Rules Below).
d. Special Actions A Force may conduct any number of the following Special Actions once: - Resolve Objective: If in the same location as an Objective Counter, flip it over and resolve. - Load / Unload Vehicles/Helicopters: Foot Units may Load or Unload Vehicles or Helicopters. - Request Fire Support: Roll a D6 + 1D6 per and select any results of any type available: - 1 None - 2-3 Artillery (2SP) - 4-5 Gunship (3SP) - 6 Airstrike (5SP) - Request Med Evac: If your Force has Casualties and is located in a Paddy, Village, River, or Bridge Hex, you may spend 1OP and 2SP to request a Med Evac Helicopter. - Medic Action: If a Force has wounded Soldiers and any Soldiers with the ( ) Skill, you may spend 1OP to provide Medical Attention (see rules below).
- Mission Completion Check
Player rotates the Operations Turn Counter.
- If the Operations number is equal to the number of Operations listed in the Briefing, the Mission ends and your Teams must return to Base Camp.
- If all the Objectives have been met, the Mission ends in success.
- If the Mission ends and the Objectives have not been met, the Mission ends in failure, and the Team must return to Base Camp.
- If the Objectives have been Completed and there are still OP left, the Team may return Home and the Mission is considered a Success.
- If there are still Operation Turns available and the Mission is not completed, go back to Step 3 (Operations Phase).
-
Victory Point Calculation Phase If the Mission has ended, total the VP earned and mark accordingly with the VP Tracking Counters.
- Soldier Replacement Check Phase
For each Soldier killed or shipped home, roll a D6:
- 1-3: Replacement Arrives (draw new Soldier with the same Specialty).